
Center Console and Radio Bezel Removal
 01-29-2012, 11:03 PM
#1
Tech Contributor
Thread Starter
Member Since: Aug 2008
Location: Oak Hill Virginia
Posts: 2,902
Likes: 0
Received 19 Likes
on
5 Posts
I know this has been covered before but I couldn't find any decent write-ups with pictures using the search function. Since I had to take console apart anyway on my 2007 coupe to install an iPod gateway I thought I'd document the process.
Disclaimer: Perform all work on your vehicle at your own risk. I cannot accept liability for any damage or injury caused by using the information in this writeup.
Here are the tools I used:
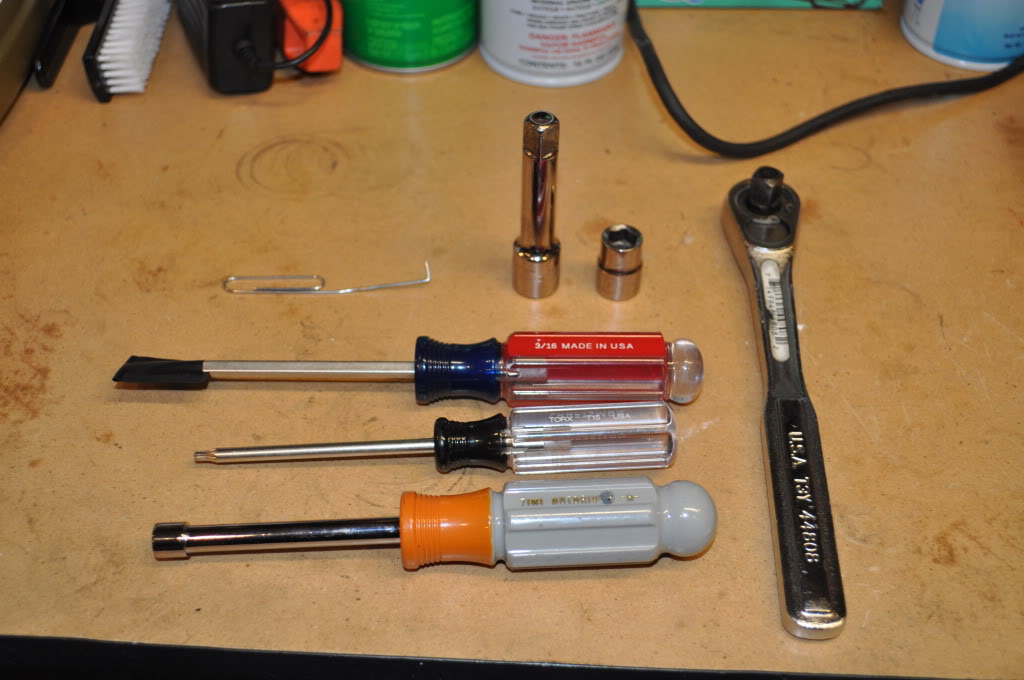
Flat blade screwdriver with some electrical tape wrapped around the blade (to protect the plastic pieces).
3/8" drive ratchet
10mm socket
3" Socket extension
7mm Nut Driver
T15 Torx Driver
Paper clip (a small interior pick tool would be better)
________________________________________ _____________________________________
Lower your windows all the way.
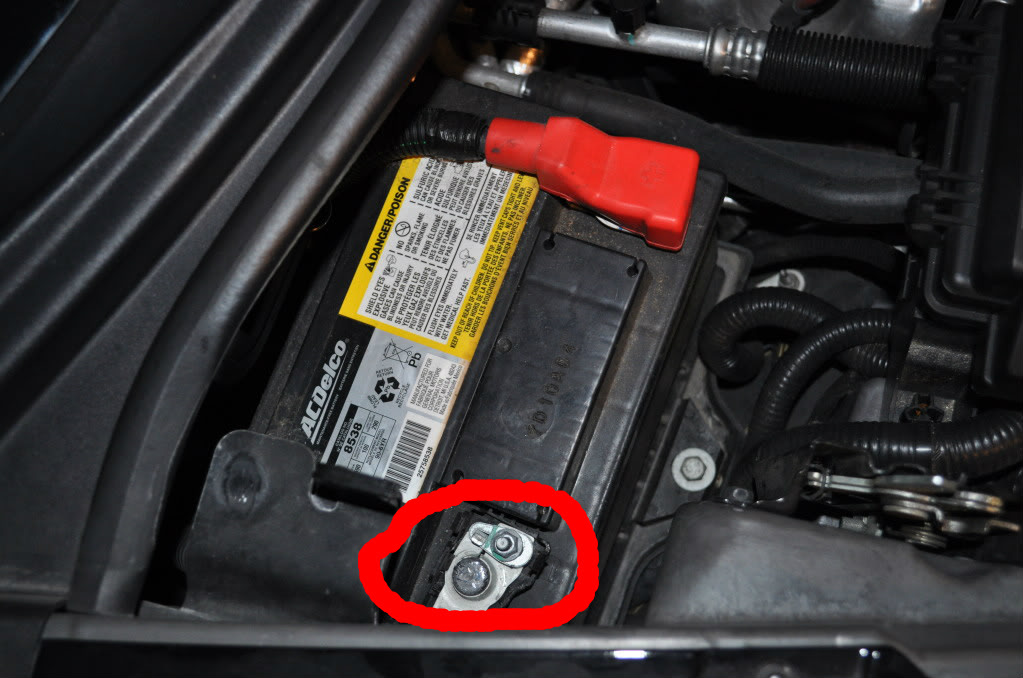
Disconnect your negative battery terminal.
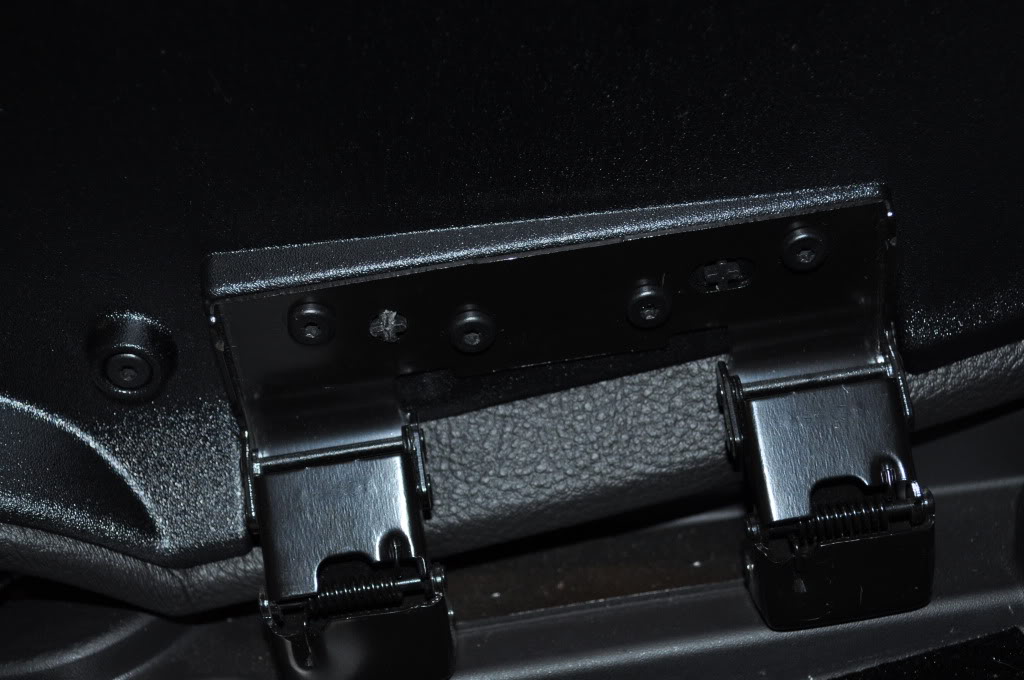
Open the center console lid and remove the four T15 torx screws and set the console lid out of the way. Note: This step isn't absolutely necessary but it does give you a little more room to work and it only takes a few seconds to do so I'd recommend it.
Using either your fingernails or a wrapped flat blade screwdriver remove the plastic caps at the rear of the center console.
Remove the two 10mm nuts that were under the caps at the rear of the center console.
Using a wrapped flat blade screwdriver pry up on the oval shaped plastic trim piece at the front of the center console as shown. Note: If you have the F55 suspension option you'll have a wiring harness to disconnect underneath the oval piece.
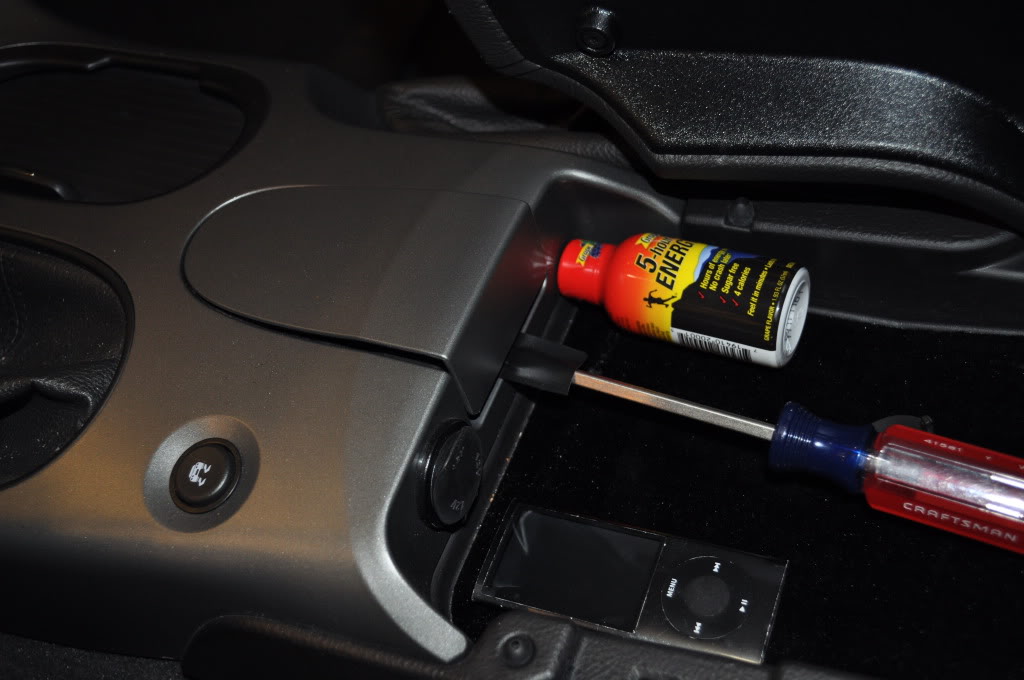
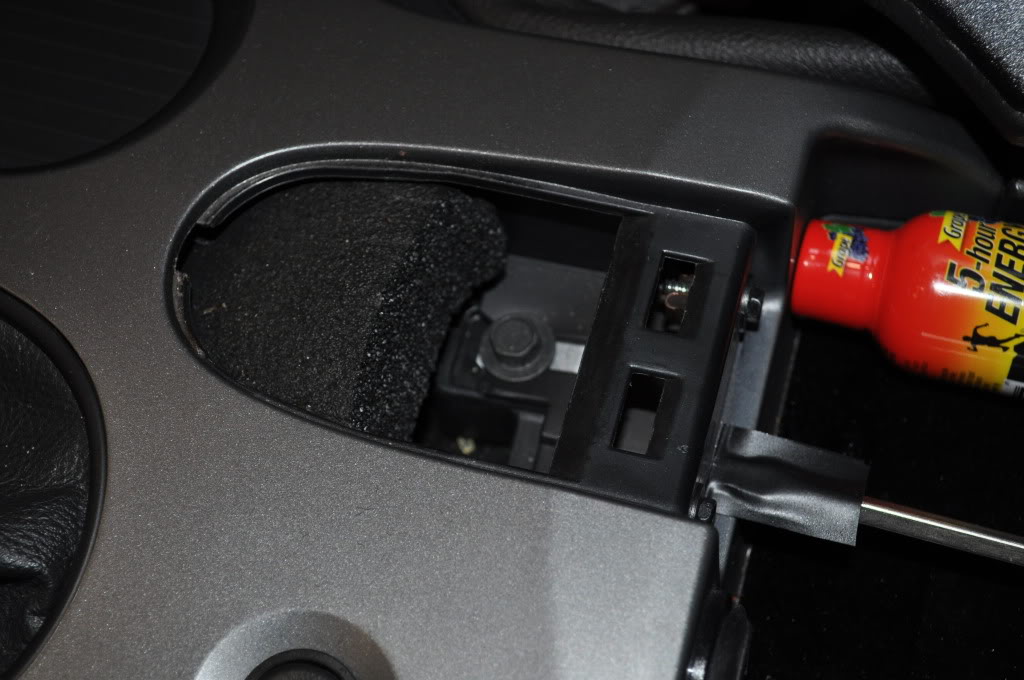
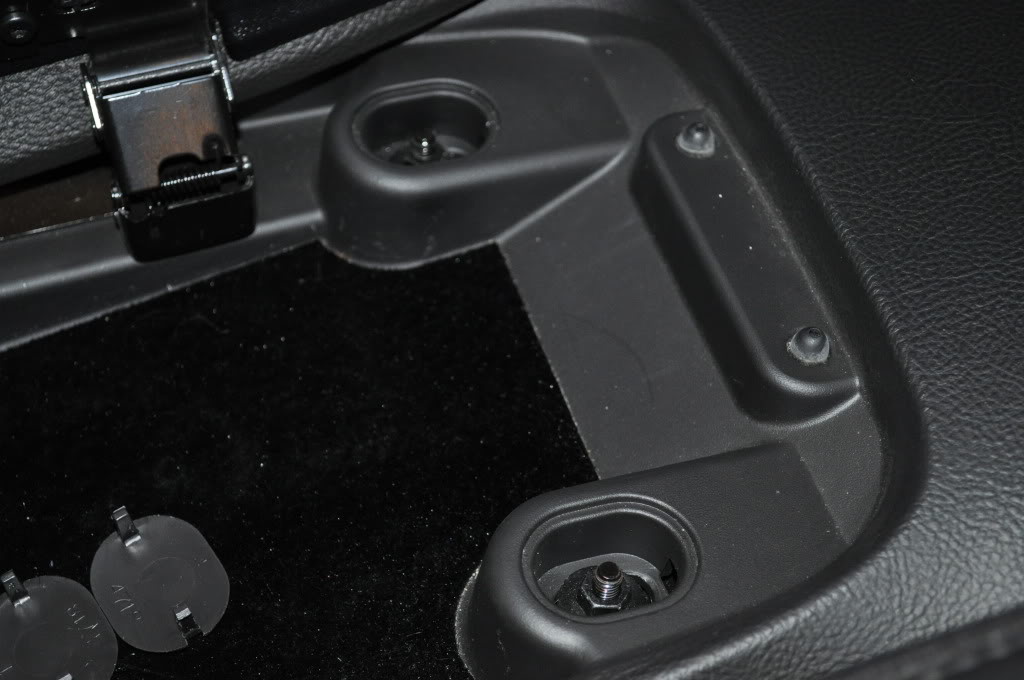
Remove the 10mm bolt that is underneath the oval shaped trim piece.
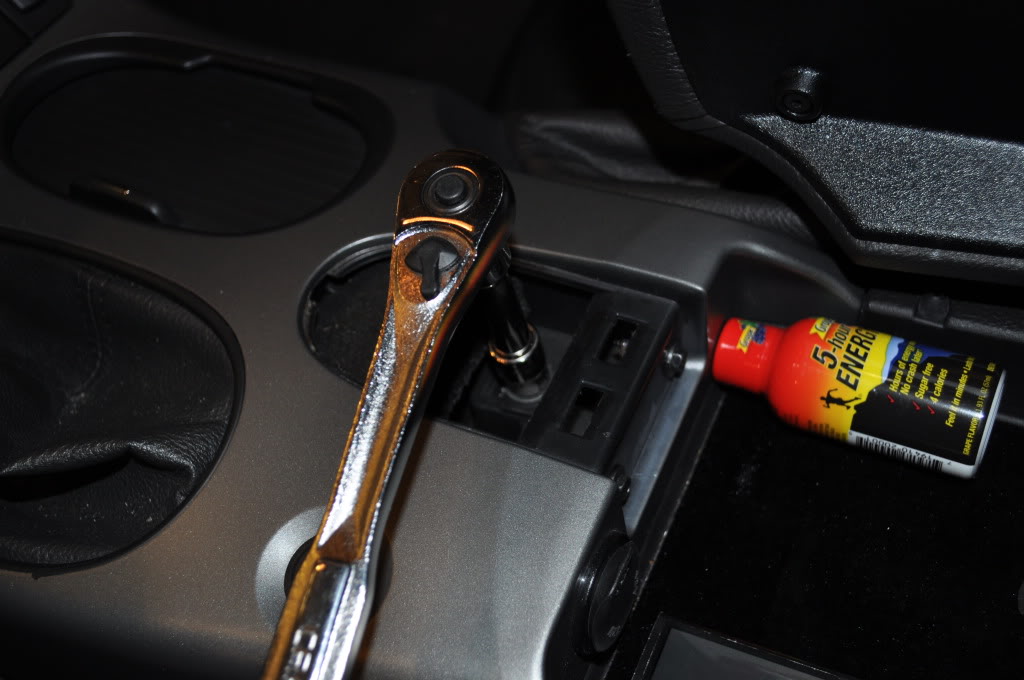
Remove the two 7mm screws at the front of the center console.
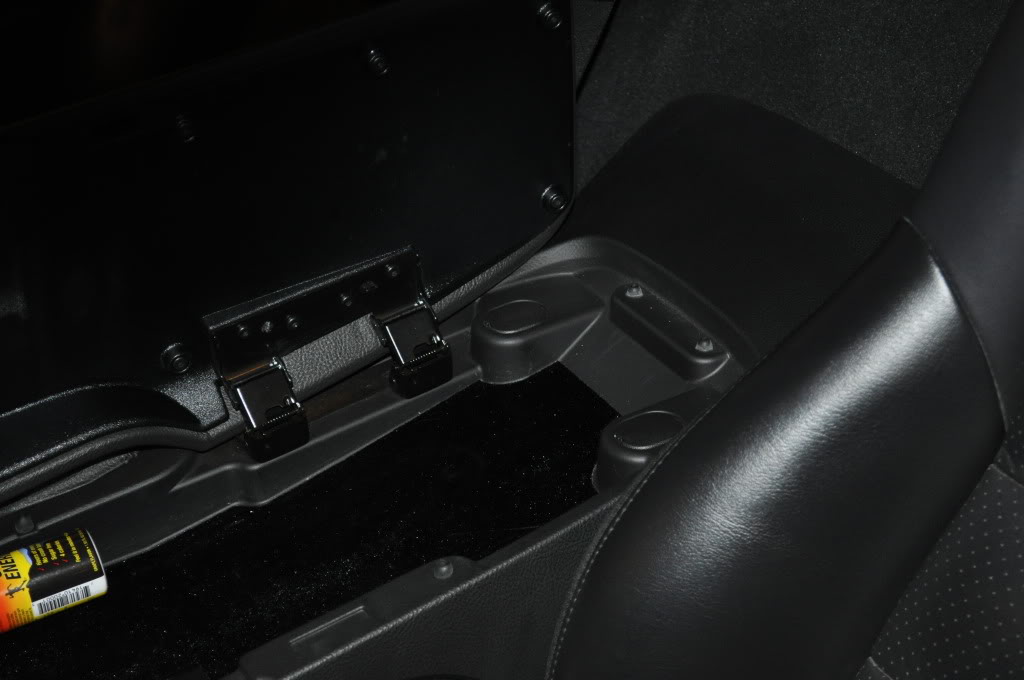
Pull up on the passenger side of the E-Brake boot. There are three clips that hold the boot down that you'll have to pop loose. Do so carefully and pull the E-Brake boot up as shown.
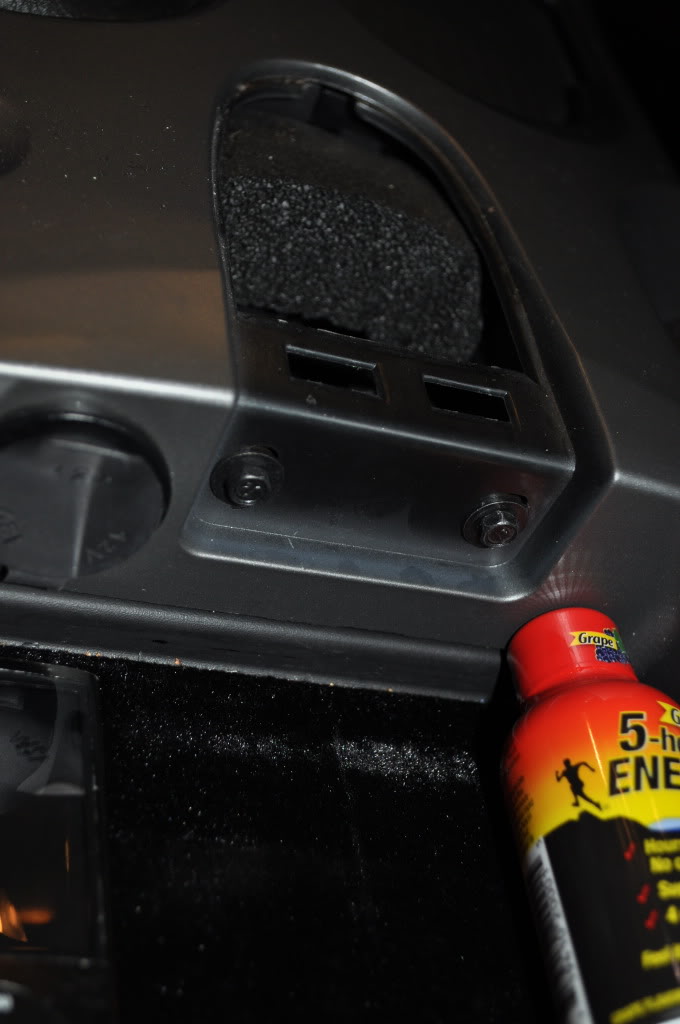
Remove the two 7mm screws that were exposed when the E-Brake boot was moved out of the way (shown below).


Carefully loosen the plastic trim piece that follows the radio bezel on the passenger side of the car. You don't need to take it all the way off, just loosen it as shown.

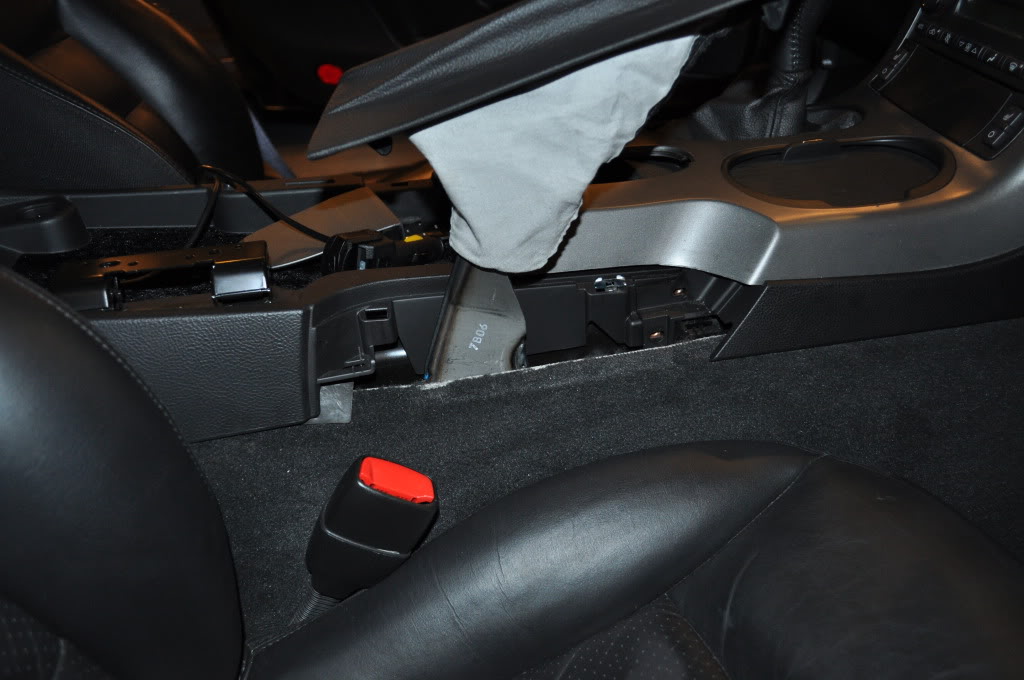
Lift the back of the center console off of the studs in the rear and slide it back towards the rear of the car. It may take some maneuvering to get it around the E-Brake boot.
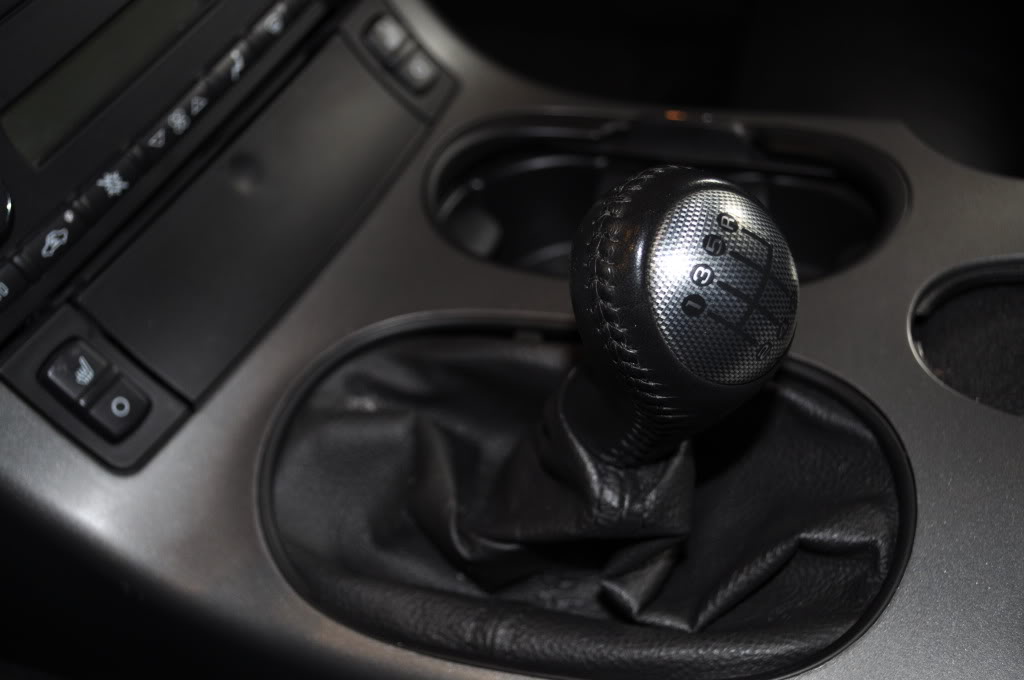
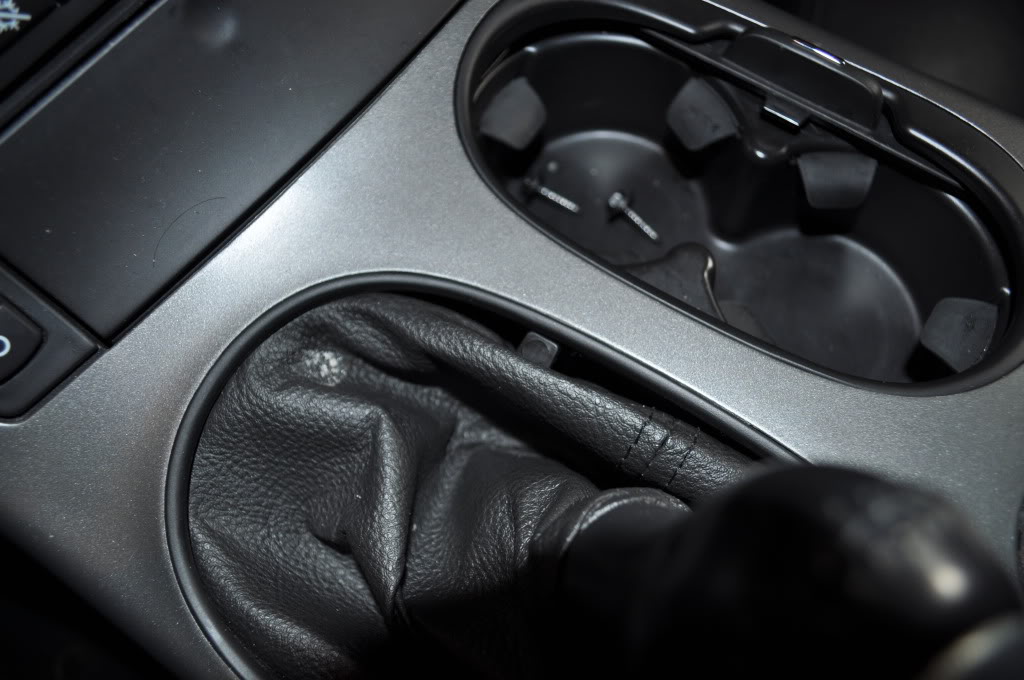
Pull the shifter boot in toward the shifter lever to release the plastic tabs from their slots in the bezel as shown.
Carefully pull the bezel up and away from the dash a few inches. There are several clips that hold it in on either side of the radio so it will not come out super easily but you shouldn't have to be superman to get it loose either. If it feels like it's not turning loose make sure it's not caught on something.
Once there are a few inches of clearance between the bezel and the dash disconnect the wiring harnesses that connected to the back of it. Mine had two heated seat harnesses, a cigarette lighter harness and a hazard switch harness at the very top.
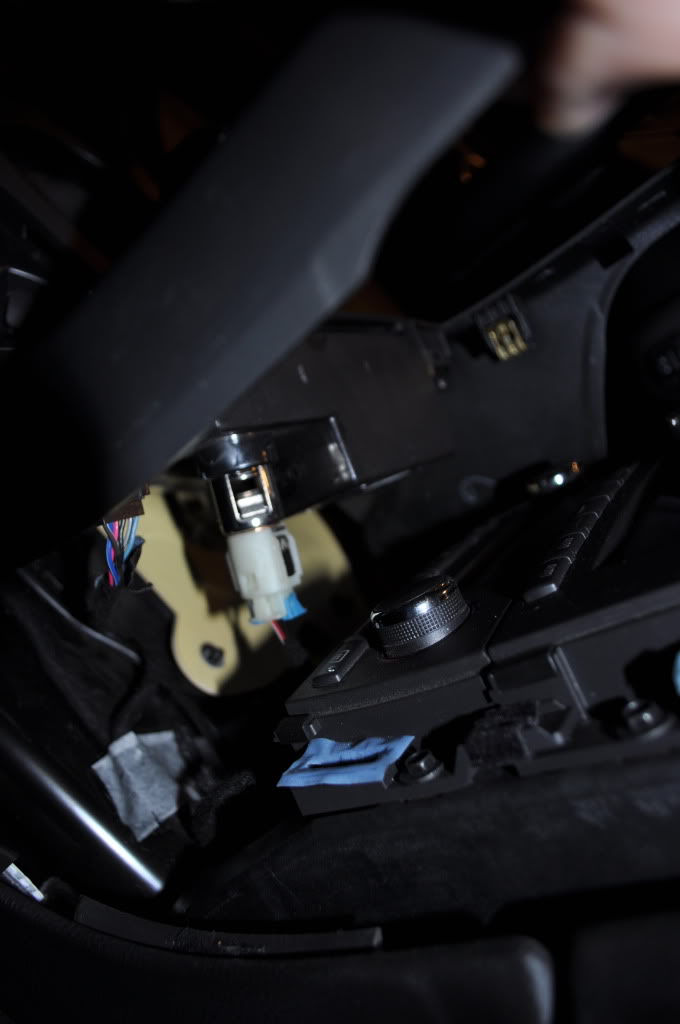
Once you've disconnected the connectors at the back of the bezel rotate it so the top of it goes toward the passenger seat and disconnect the remaining two wiring harnesses toward the back of the piece. The Active Handling/Traction Control connector is pretty much self explanatory. There is a plastic piece on the side of it that you gently pry up that will allow you to disconnect it.
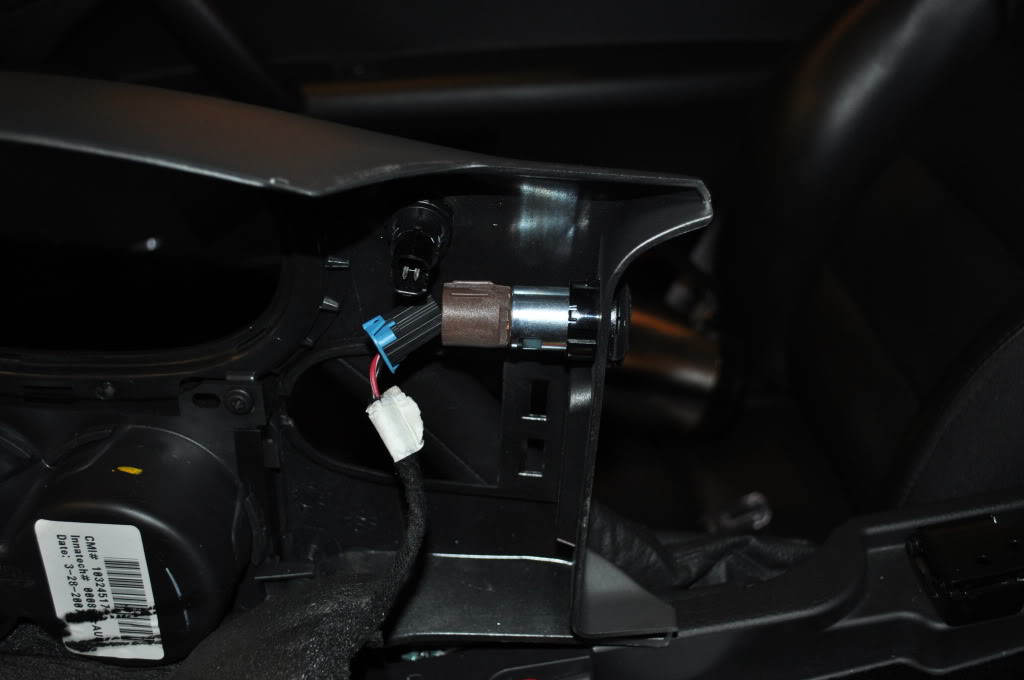
The cigarette lighter connector was the single worst part of this job. It took me a few minutes of looking/feeling to figure it out. There is a hole at the very top of the female end of the connector that the male end clips into holding it in place. The only problem is that the aforementioned hole is located at the very top of the connector facing the underside of the bezel... WTF GM? Anyway you'll need a tool like this one:
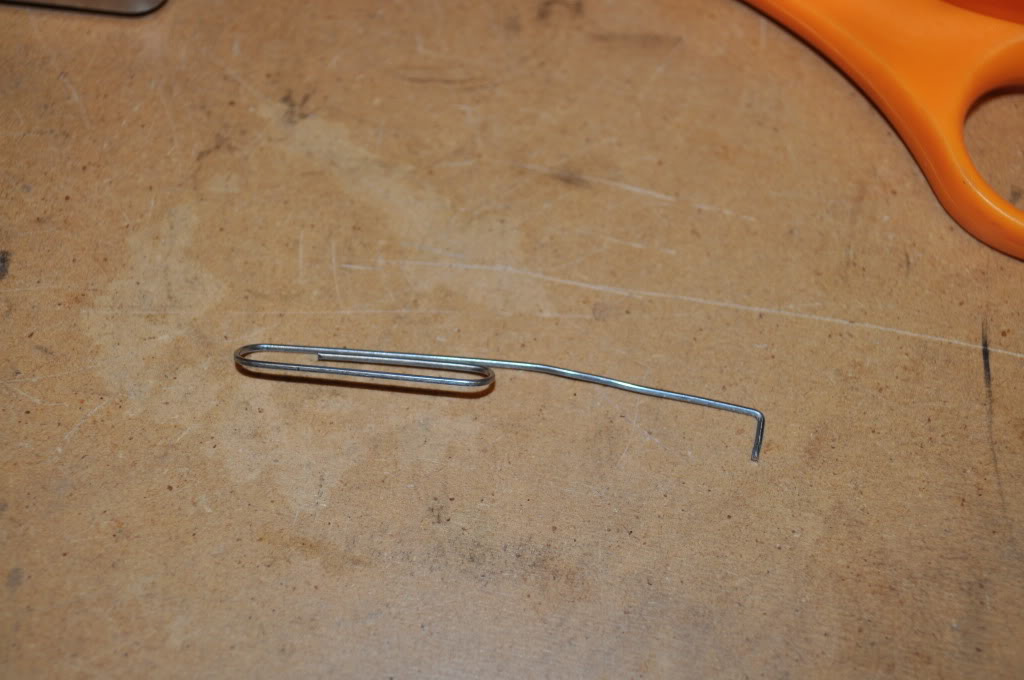
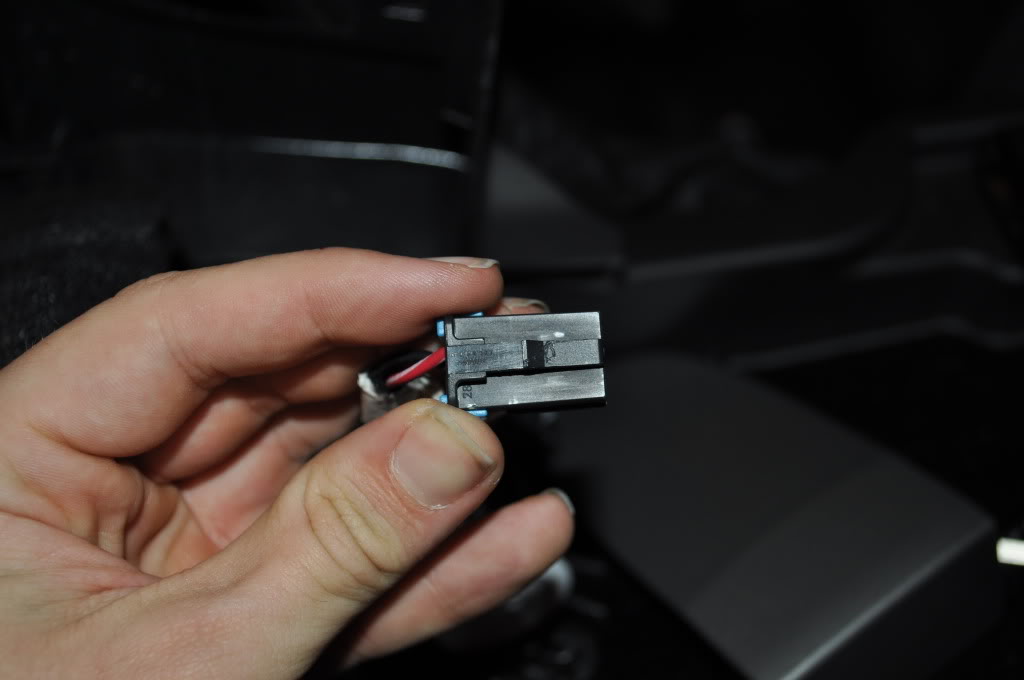
or a short interior pick to stick down in the hole and release the clip holding the harness in place and pull back (toward the dash) on the harness at the same time. Here is the connector disconnected. The part facing the camera is pointed up (facing the bottom of the bezel) when installed.
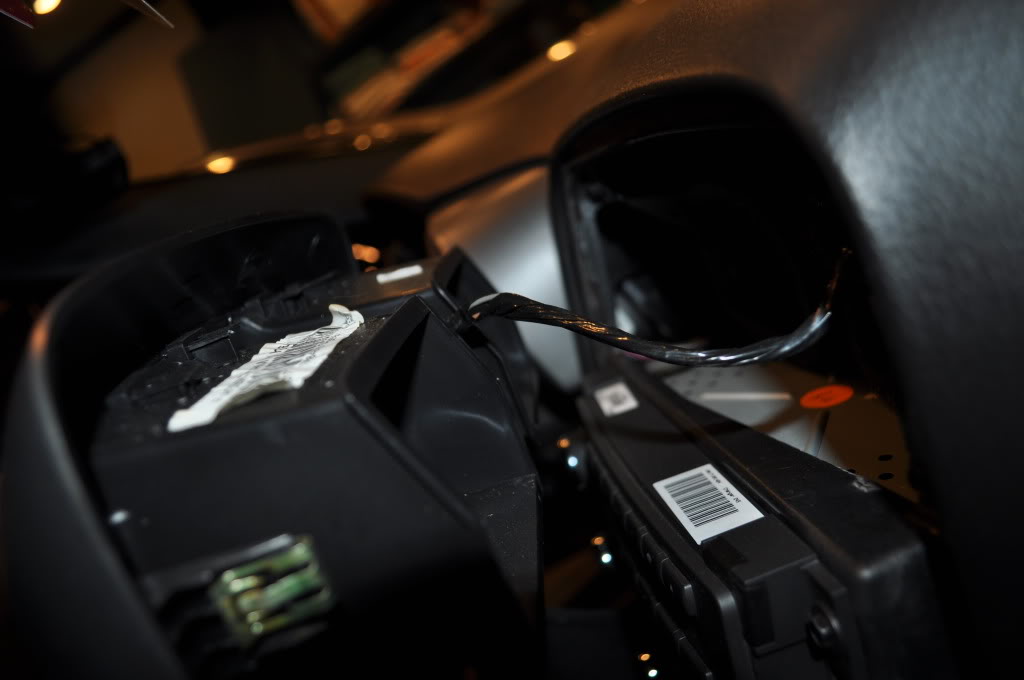
Set the bezel aside.

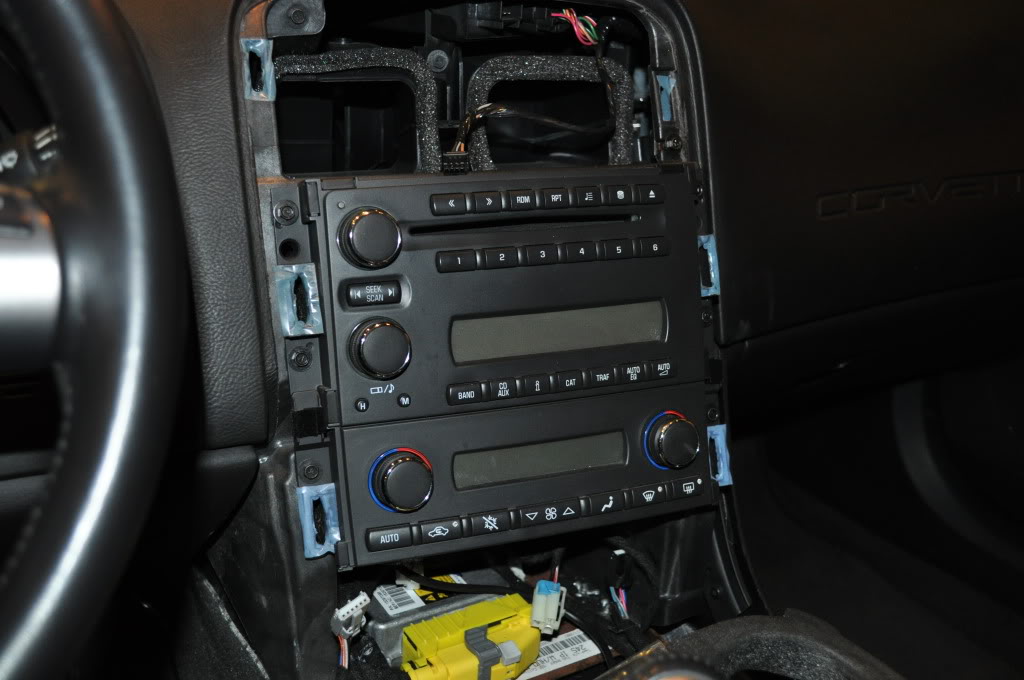
This is what you're left with in the car. If you want to remove the radio and the A/C head unit just remove the six 7mm bolts and pull them out. You'll have several wiring harnesses in the back to disconnect as you go but there is plenty of slack in all of them. I didn't get pictures of this step but it's pretty intuitive.
Reverse the steps above to get everything back together. Don't forget to reconnect the hazard switch at the top of the bezel... that one's easy to forget.
Disclaimer: Perform all work on your vehicle at your own risk. I cannot accept liability for any damage or injury caused by using the information in this writeup.
Here are the tools I used:
Flat blade screwdriver with some electrical tape wrapped around the blade (to protect the plastic pieces).
3/8" drive ratchet
10mm socket
3" Socket extension
7mm Nut Driver
T15 Torx Driver
Paper clip (a small interior pick tool would be better)
________________________________________ _____________________________________
Lower your windows all the way.
Disconnect your negative battery terminal.
Open the center console lid and remove the four T15 torx screws and set the console lid out of the way. Note: This step isn't absolutely necessary but it does give you a little more room to work and it only takes a few seconds to do so I'd recommend it.
Using either your fingernails or a wrapped flat blade screwdriver remove the plastic caps at the rear of the center console.
Remove the two 10mm nuts that were under the caps at the rear of the center console.
Using a wrapped flat blade screwdriver pry up on the oval shaped plastic trim piece at the front of the center console as shown. Note: If you have the F55 suspension option you'll have a wiring harness to disconnect underneath the oval piece.
Remove the 10mm bolt that is underneath the oval shaped trim piece.
Remove the two 7mm screws at the front of the center console.
Pull up on the passenger side of the E-Brake boot. There are three clips that hold the boot down that you'll have to pop loose. Do so carefully and pull the E-Brake boot up as shown.
Remove the two 7mm screws that were exposed when the E-Brake boot was moved out of the way (shown below).
Carefully loosen the plastic trim piece that follows the radio bezel on the passenger side of the car. You don't need to take it all the way off, just loosen it as shown.
Lift the back of the center console off of the studs in the rear and slide it back towards the rear of the car. It may take some maneuvering to get it around the E-Brake boot.
Pull the shifter boot in toward the shifter lever to release the plastic tabs from their slots in the bezel as shown.
Carefully pull the bezel up and away from the dash a few inches. There are several clips that hold it in on either side of the radio so it will not come out super easily but you shouldn't have to be superman to get it loose either. If it feels like it's not turning loose make sure it's not caught on something.
Once there are a few inches of clearance between the bezel and the dash disconnect the wiring harnesses that connected to the back of it. Mine had two heated seat harnesses, a cigarette lighter harness and a hazard switch harness at the very top.
Once you've disconnected the connectors at the back of the bezel rotate it so the top of it goes toward the passenger seat and disconnect the remaining two wiring harnesses toward the back of the piece. The Active Handling/Traction Control connector is pretty much self explanatory. There is a plastic piece on the side of it that you gently pry up that will allow you to disconnect it.
The cigarette lighter connector was the single worst part of this job. It took me a few minutes of looking/feeling to figure it out. There is a hole at the very top of the female end of the connector that the male end clips into holding it in place. The only problem is that the aforementioned hole is located at the very top of the connector facing the underside of the bezel... WTF GM? Anyway you'll need a tool like this one:
or a short interior pick to stick down in the hole and release the clip holding the harness in place and pull back (toward the dash) on the harness at the same time. Here is the connector disconnected. The part facing the camera is pointed up (facing the bottom of the bezel) when installed.
Set the bezel aside.
This is what you're left with in the car. If you want to remove the radio and the A/C head unit just remove the six 7mm bolts and pull them out. You'll have several wiring harnesses in the back to disconnect as you go but there is plenty of slack in all of them. I didn't get pictures of this step but it's pretty intuitive.
Reverse the steps above to get everything back together. Don't forget to reconnect the hazard switch at the top of the bezel... that one's easy to forget.
Last edited by cdkcorvette7; 02-01-2012 at 01:44 AM.

The following 14 users liked this post by cdkcorvette7:
BillyQ (06-27-2018),
Dans91 (01-02-2020),
Don6775 (05-18-2017),
Geno94 (07-04-2020),
goldbond70 (12-01-2019),
and 9 others liked this post.
01-29-2012, 11:29 PM
#2
Pro


That is a really good write-up.
After doing mine, more than once, the one tip I would add is that when re-installing the lower console (bottom part of glove box) is to make sure it is pulled all the way back when tightening the two rear nuts. This will allow the radio bezel to sit down better and align better with the lower console where they meet.
After doing mine, more than once, the one tip I would add is that when re-installing the lower console (bottom part of glove box) is to make sure it is pulled all the way back when tightening the two rear nuts. This will allow the radio bezel to sit down better and align better with the lower console where they meet.
01-29-2012, 11:37 PM
#3
Le Mans Master

Nice write up. Did mine many times and by coincidence twice today. (don't ask). The only thing I would say is I don't see the need to remove the 10mm bolts at the rear of the console.
01-30-2012, 12:10 AM
#4
Race Car Tech

 great write-up
Thanks
 01-30-2012, 12:25 AM
#5
Safety Car

Nice.
I would add a small addendum to this. If you only need to get the bezel out of the way and not remove it totally (as in replacing a shifter or the like) you can avoid messing with the lighter connectors and (if I remember correctly) the aux power connector and the traction control switch connector by simply disconnecting everything else and then carefully rotating the entire bezel into the passenger footwell. The wires are long enough to handle it. Be sure to wrap the bezel in a towel or something before you do this as the bezel has some sharp corners that can scratch the dash and glove box. Eliminating three connector battles is a nice thing.
Z//
The following 4 users liked this post by Zoxxo:

 01-30-2012, 01:41 AM
#7
Safety Car
Member Since: Feb 2008
Location: TEXOMA
Posts: 3,712
Likes: 0
Received 3 Likes
on
3 Posts
St. Jude Donor '08-'09

Thanks!! This will help a lot, I removed my console about two months ago. I had my friend wrap it with 3m Di-Noc while I had some trans work done. Now it will be a lot easier putting it all back together!

-Carl
-Carl
01-30-2012, 10:15 AM
#8
Tech Contributor
Member Since: Dec 2006
Location: Van Buren Arkansas
Posts: 10,962
Likes: 0
Received 26 Likes
on
25 Posts
Wounded Warrior Escort '11
You left out the two screws on the side, adjacent to the e-brake lever. In your pictures, you show those two already out. Extra warning on those as I found out the hard way, they are really easy to drop and disappear down into places/parts unknown...I still haven't found one of mine. All else is good. This center console is a PITA to remove and install whereas the C-5 is easy. No clue why they had to make it so difficult.
The following users liked this post:
ottomatic (07-31-2016)
01-30-2012, 11:14 AM
#9
Tech Contributor
Thread Starter
Member Since: Aug 2008
Location: Oak Hill Virginia
Posts: 2,902
Likes: 0
Received 19 Likes
on
5 Posts
That is a really good write-up.
After doing mine, more than once, the one tip I would add is that when re-installing the lower console (bottom part of glove box) is to make sure it is pulled all the way back when tightening the two rear nuts. This will allow the radio bezel to sit down better and align better with the lower console where they meet.
After doing mine, more than once, the one tip I would add is that when re-installing the lower console (bottom part of glove box) is to make sure it is pulled all the way back when tightening the two rear nuts. This will allow the radio bezel to sit down better and align better with the lower console where they meet.
You left out the two screws on the side, adjacent to the e-brake lever. In your pictures, you show those two already out. Extra warning on those as I found out the hard way, they are really easy to drop and disappear down into places/parts unknown...I still haven't found one of mine. All else is good. This center console is a PITA to remove and install whereas the C-5 is easy. No clue why they had to make it so difficult.
Thanks for the kind words guys. I was surprised there wasn't already a write-up like this in this section. I found a few old ones when I searched but the pictures aren't hosted anymore.


 thank.. Getting ready to pull mine soon..
01-31-2012, 11:31 AM
thank.. Getting ready to pull mine soon..
01-31-2012, 11:31 AM
#14
Tech Contributor
Thread Starter
Member Since: Aug 2008
Location: Oak Hill Virginia
Posts: 2,902
Likes: 0
Received 19 Likes
on
5 Posts
Nope, no need to remove the ****. If you have an auto you might want to shift into neutral and set the ebrake when you start. I'm not sure if you'd have enough clearance to slide the bezel up and over it if you're in park...
01-31-2012, 06:51 PM
#15
Intermediate


Member Since: Apr 2008
Location: Raleigh NC
Posts: 33
Likes: 0
Received 0 Likes
on
0 Posts
Yes I do have an auto. Thanks again for the excellent write up.
01-31-2012, 08:01 PM
#16
Melting Slicks

Member Since: Sep 2007
Location: Long Island, Nassau County New York
Posts: 2,599
Likes: 0
Received 1 Like
on
1 Post
Great instructions. However, Im still uncomfortable with doing this myself. Im on Long Island and was wondering if someone local would be able to lend a hand with installing mine.
01-31-2012, 11:00 PM
#17
Tech Contributor
Thread Starter
Member Since: Aug 2008
Location: Oak Hill Virginia
Posts: 2,902
Likes: 0
Received 19 Likes
on
5 Posts
Try one of these:
http://www.licoa.org/
http://www.longislandvettes.com/
http://www.corvettelegends.com/clubs/ny.htm
Last edited by cdkcorvette7; 01-31-2012 at 11:10 PM.
01-31-2012, 11:06 PM
#18
Tech Contributor
Thread Starter
Member Since: Aug 2008
Location: Oak Hill Virginia
Posts: 2,902
Likes: 0
Received 19 Likes
on
5 Posts
You left out the two screws on the side, adjacent to the e-brake lever. In your pictures, you show those two already out. Extra warning on those as I found out the hard way, they are really easy to drop and disappear down into places/parts unknown...I still haven't found one of mine. All else is good. This center console is a PITA to remove and install whereas the C-5 is easy. No clue why they had to make it so difficult.
02-01-2012, 09:51 AM
#19
Melting Slicks
Member Since: Sep 2007
Location: Long Island, Nassau County New York
Posts: 2,599
Likes: 0
Received 1 Like
on
1 Post
Thanks. Im already a member of one. I was gonna ask one of those guys too.
You almost definitely have a local corvette club over there. Look them up and I'm sure someone will help you out...
Try one of these:
http://www.licoa.org/
http://www.longislandvettes.com/
http://www.corvettelegends.com/clubs/ny.htm
Try one of these:
http://www.licoa.org/
http://www.longislandvettes.com/
http://www.corvettelegends.com/clubs/ny.htm

