

 02-19-2015, 07:05 PM
Last edit by: IB Advertising
See related guides and technical advice from our community experts:
Browse all: Exterior How-Tos
- How to Replace Side Mirrors
Step by step instructions for do-it-yourselfers.
- How to Repair Floppy Side Mirrors
Step by step instructions for do-it-yourselfers.
Browse all: Exterior How-Tos

How to fix a floppy side mirror
08-19-2008, 06:42 PM
#1
Racer

Thread Starter
And here it is. How to finally fix a floppy side mirror. Not sure if anyone else has posted this solution yet, but this worked for me. On both sides.
- First off, remove the door panel
- Remove the little clip underneath the door handle. Just use a screwdriver, as it should come off very easily
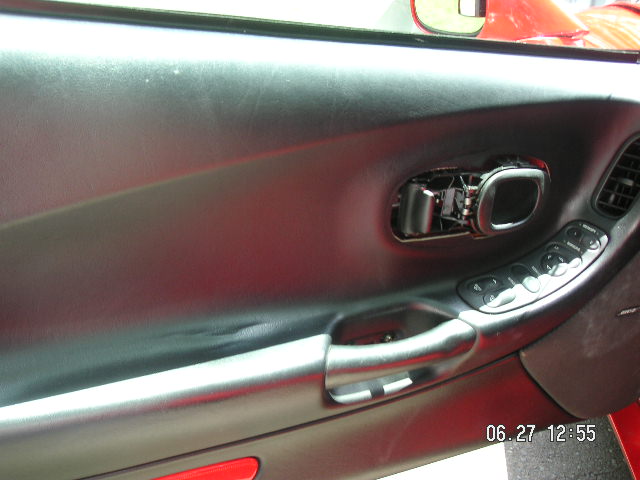
- Next step is to remove the ring around the handle. This one is a bit trickier, but can also be removed with a screwdriver. Just push in the clips and the ring comes off.
- Getting the panel off is a bit tricky. Make sure you lift the top part off the lip of the door. If you do manage to break some of the clips around the door, you can always just get new ones from GM
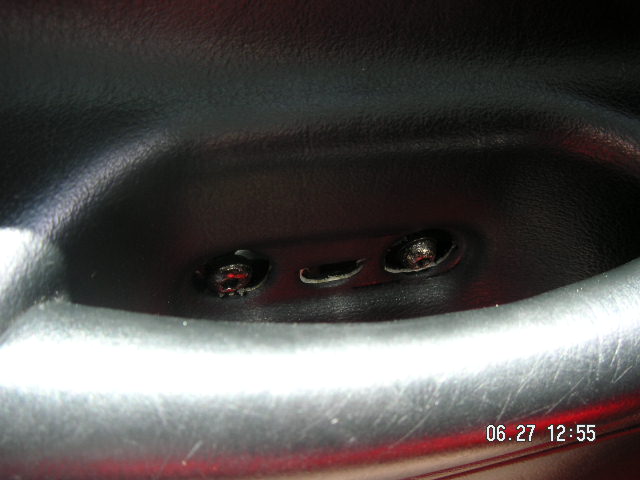
- Next we need to remove the mirror. There are three nuts inside the door that holds the mirror.
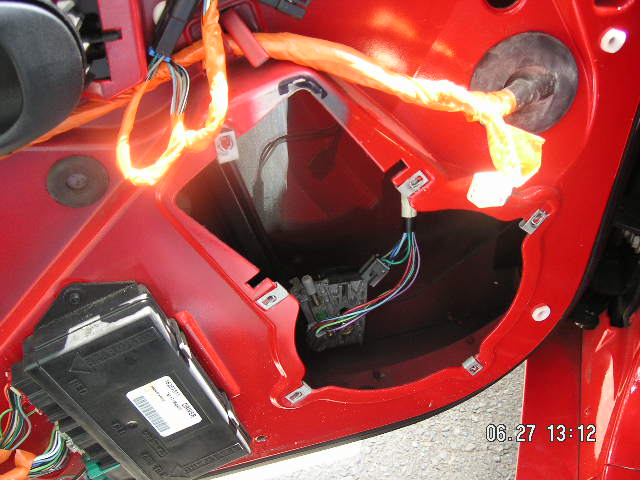
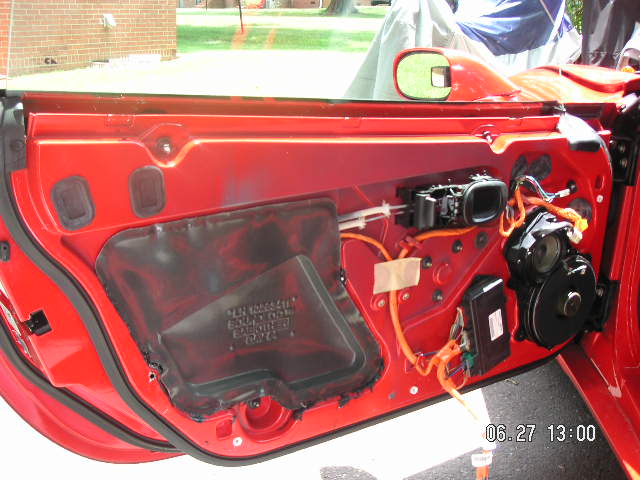
- Remove the speakers. Much easier to get to the cables once the speakers are out. Also if some of the nuts fall in the door you can get them
- First off, remove the door panel
- Remove the little clip underneath the door handle. Just use a screwdriver, as it should come off very easily
- Next step is to remove the ring around the handle. This one is a bit trickier, but can also be removed with a screwdriver. Just push in the clips and the ring comes off.
- Getting the panel off is a bit tricky. Make sure you lift the top part off the lip of the door. If you do manage to break some of the clips around the door, you can always just get new ones from GM
- Next we need to remove the mirror. There are three nuts inside the door that holds the mirror.
- Remove the speakers. Much easier to get to the cables once the speakers are out. Also if some of the nuts fall in the door you can get them
 08-19-2008, 06:46 PM
#2
Racer
Thread Starter
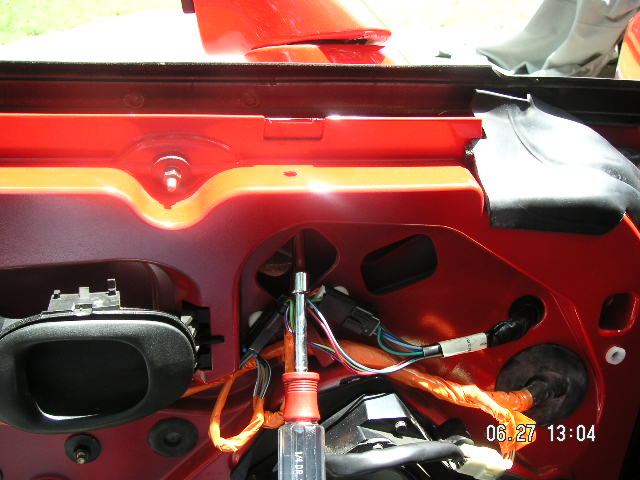
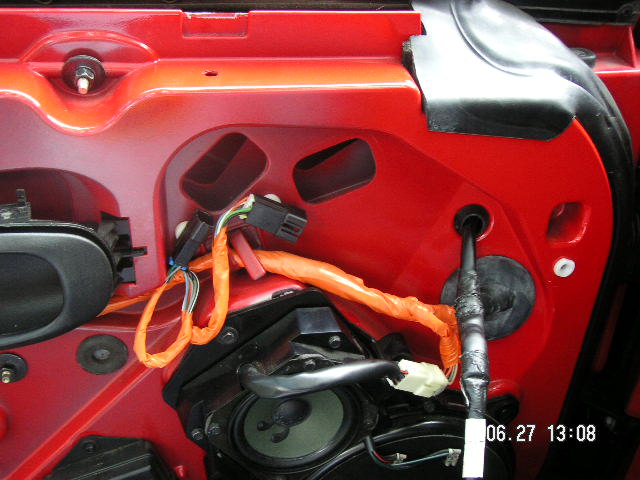
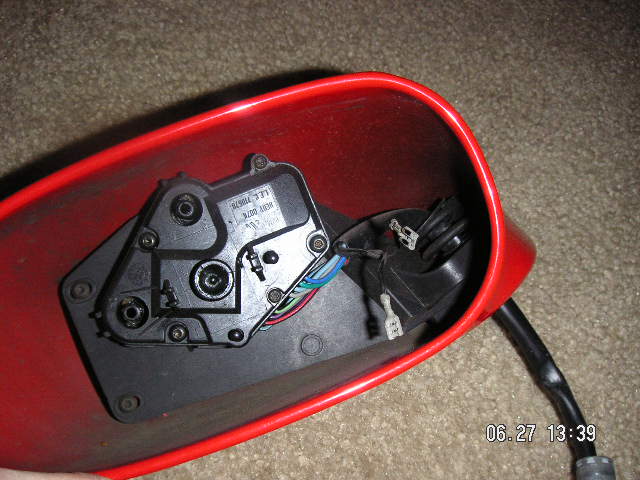
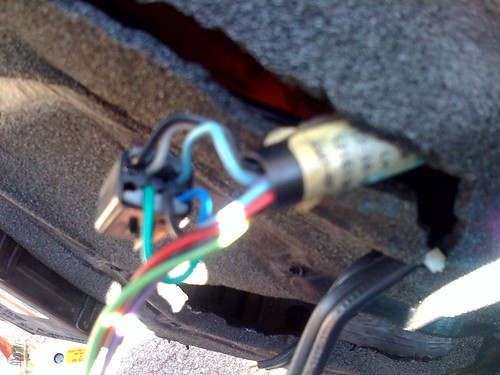
- Now loosen the connectors and snake the mirror cable through the door. Inside the door there are clips that hold the cable. Smaller hands are much easier to get to them.
- A bit difficult to see, but the white clips are what holds the cable.
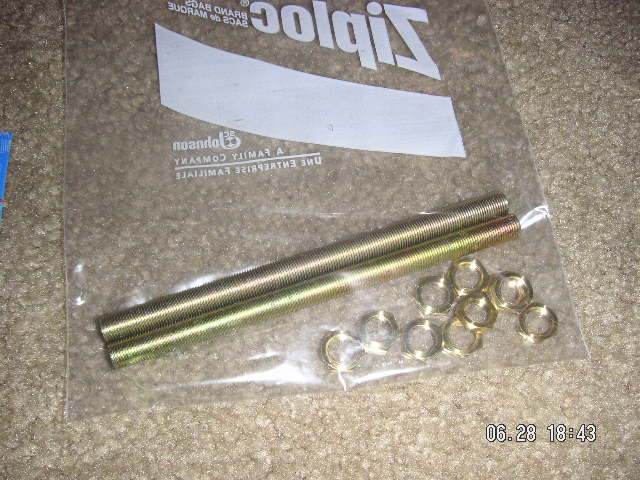
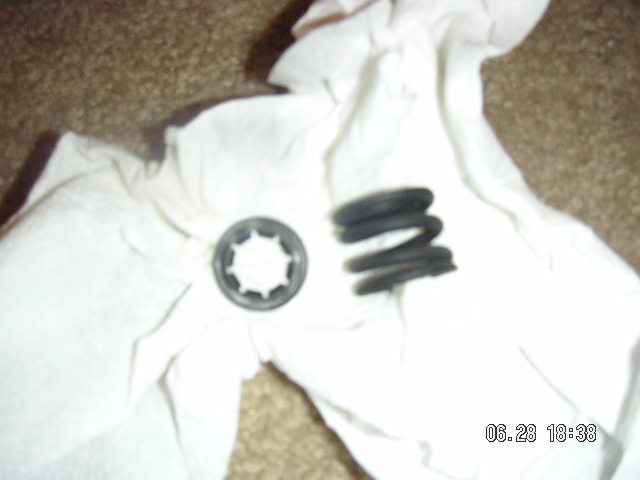
Now for the parts to fix the mirror

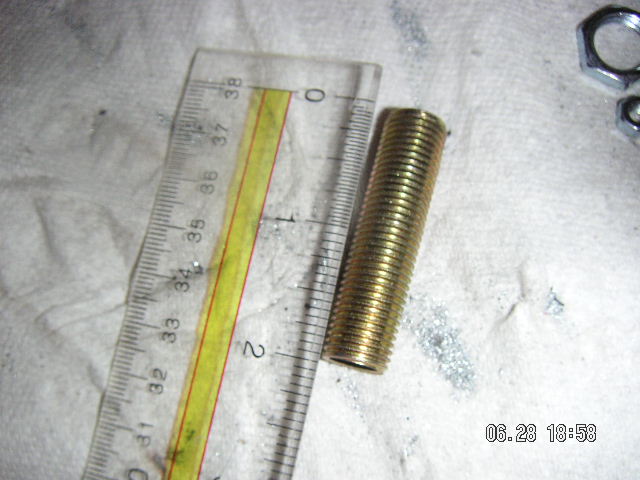
- Locknuts and threaded bars. Both of these I bought at Home Depot in the lamp department
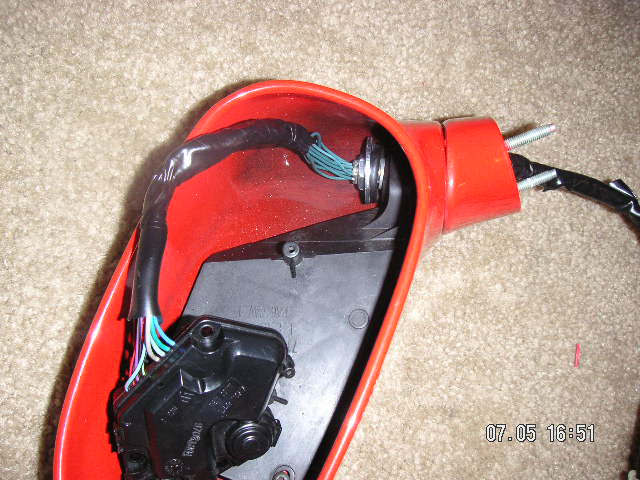
- Take the glass off the mirror. The glass just clips off, with extra wires for heat. Be careful not to break the glass though. My back part came loose as well. Not a big problem, just glued everything back together later on.
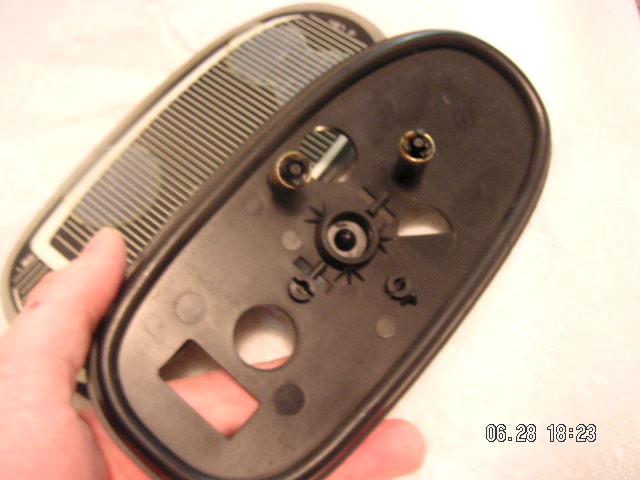
- The mirror without the glass. As you can see the little washer came off. It is just held in the grooves, so it comes off quite easily. No way to just put it back though.
Now cut the wire. I cut it a bit too short here. Give yourself a bit more space. Also, make sure you know how to solder before you do this, as you will have to resolder the wires again.
- A bit difficult to see, but the white clips are what holds the cable.
Now for the parts to fix the mirror
- Locknuts and threaded bars. Both of these I bought at Home Depot in the lamp department
- Take the glass off the mirror. The glass just clips off, with extra wires for heat. Be careful not to break the glass though. My back part came loose as well. Not a big problem, just glued everything back together later on.
- The mirror without the glass. As you can see the little washer came off. It is just held in the grooves, so it comes off quite easily. No way to just put it back though.
Now cut the wire. I cut it a bit too short here. Give yourself a bit more space. Also, make sure you know how to solder before you do this, as you will have to resolder the wires again.
08-19-2008, 06:50 PM
#3
Racer
Thread Starter
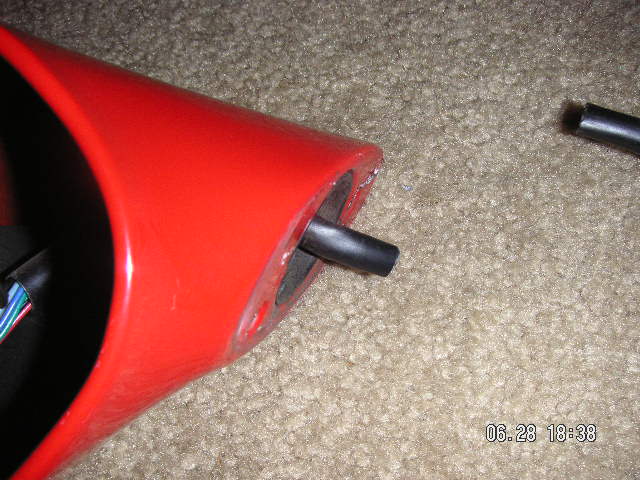
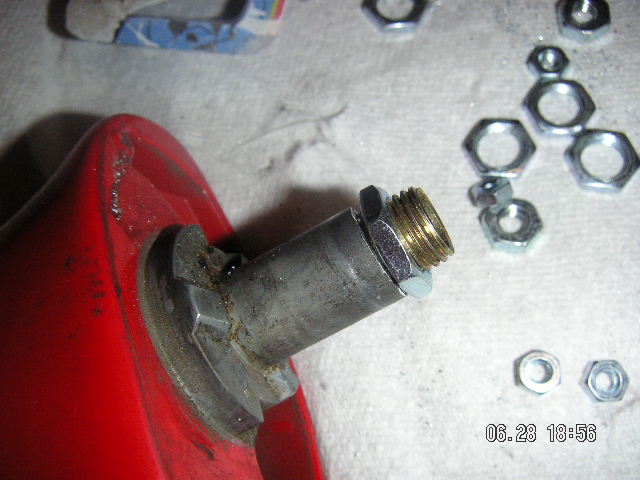
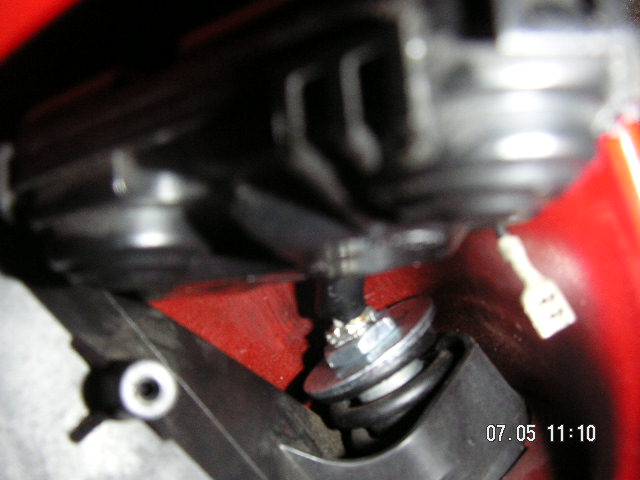
- Now thread the wire through the hole. You need to take out the spring and washer. Pull the two pieces of the mirror apart.
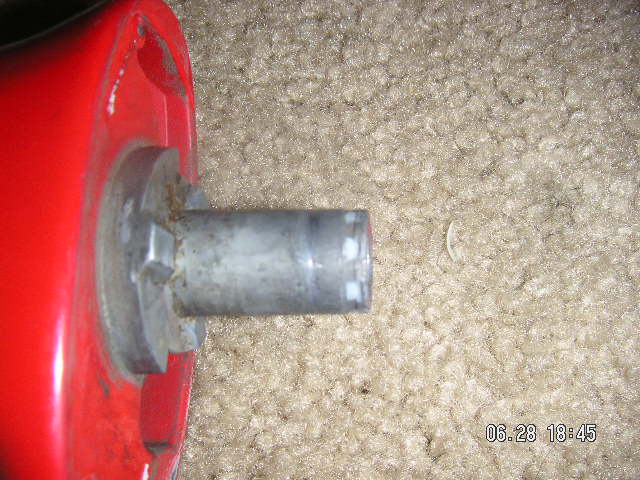
- This is the mirror on the one side. Take a saw and cut the little pipe off right in the groove. You need to do this so that the spring can compress properly. Its not a problem if you go a bit low, but not too far.
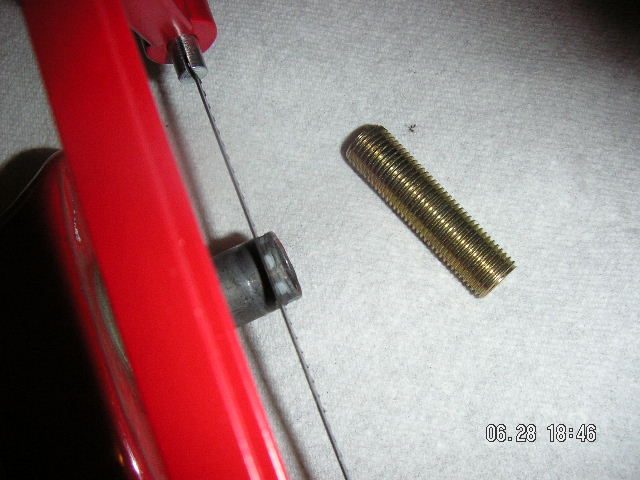
- Thread one of the bars through the hole. It should stick out a bit on the top and bottom, for the nuts.
 08-19-2008, 06:53 PM
#4
Racer
Thread Starter
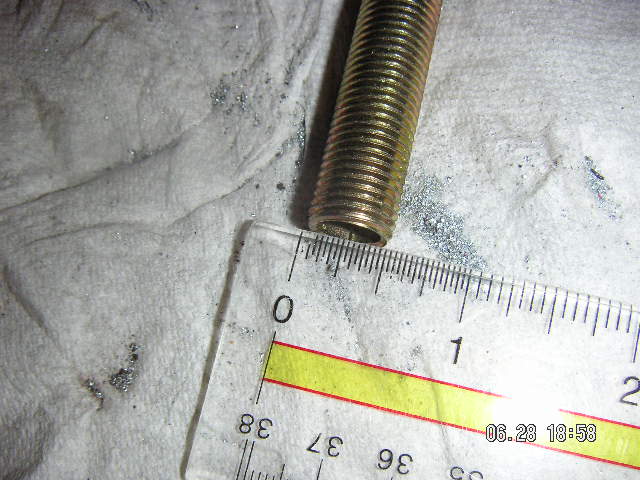
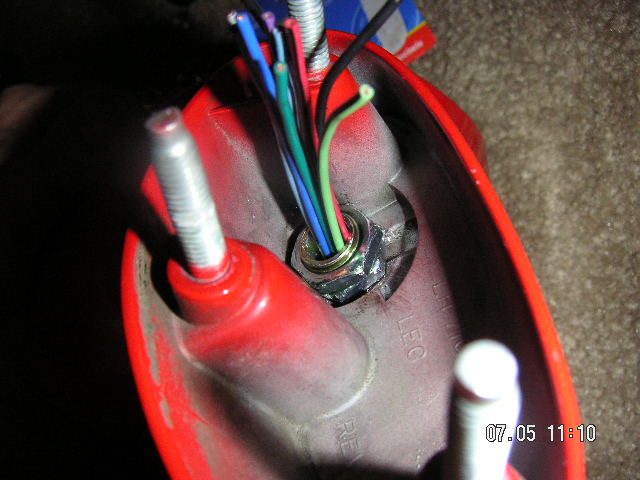
- Few more photos on the bars

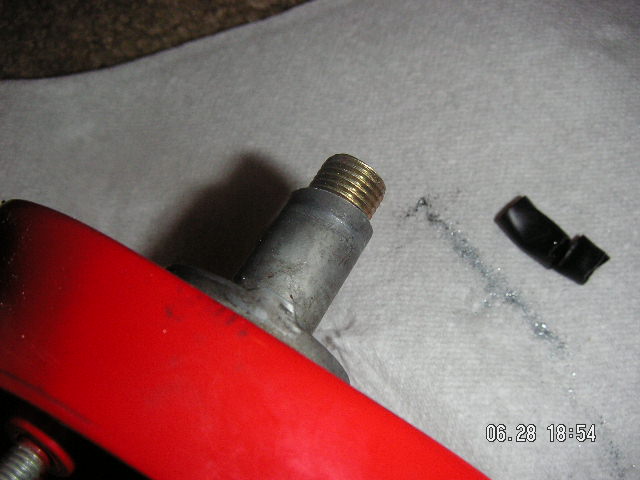
- This is what the end result will look like inside the mirror. This is just to show how the whole system works. Have to take the nuts off to assemble the whole unit.
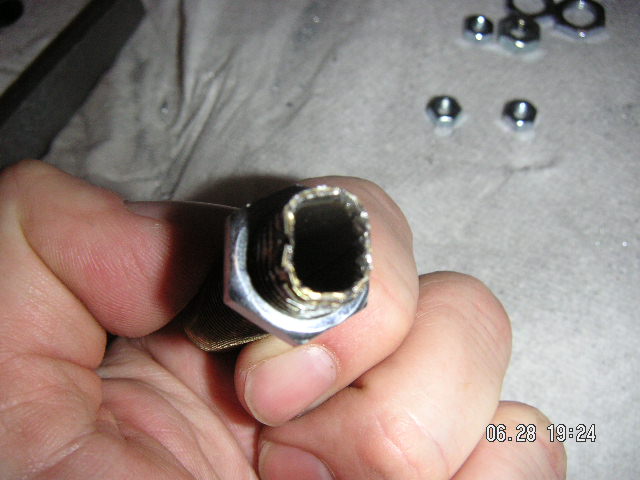
- I crushed the top of the bar to keep the nut from coming off
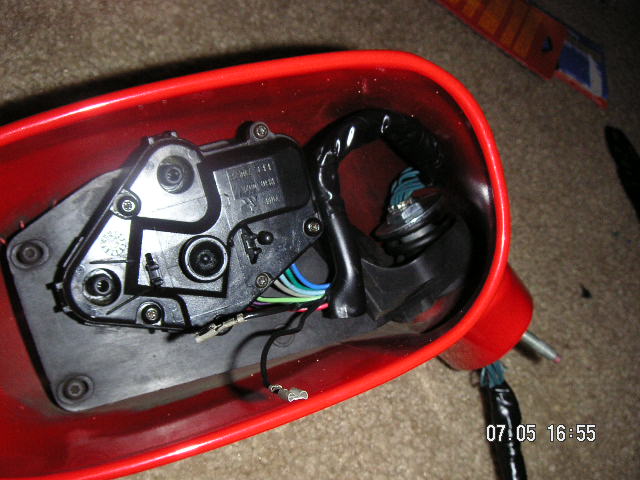
- Everything assembled inside the mirror with the wires threaded through. You will have to strip off some of the plastic to get the wires through.
- This is what the end result will look like inside the mirror. This is just to show how the whole system works. Have to take the nuts off to assemble the whole unit.
- I crushed the top of the bar to keep the nut from coming off
- Everything assembled inside the mirror with the wires threaded through. You will have to strip off some of the plastic to get the wires through.
08-19-2008, 06:55 PM
#5
Racer
Thread Starter
- The bottom of the mirror with two nuts to make sure it does not come loose

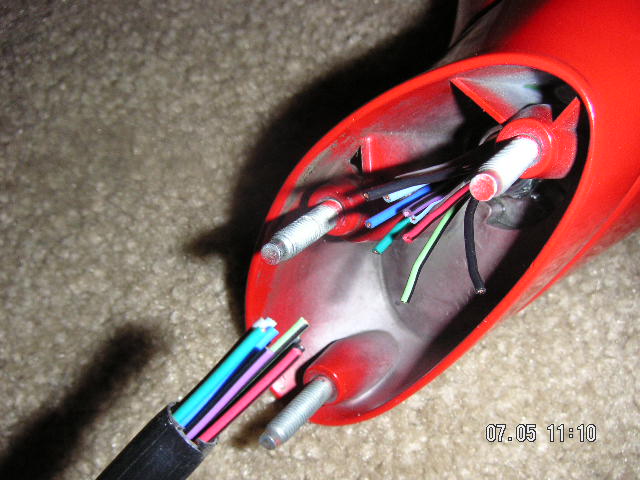
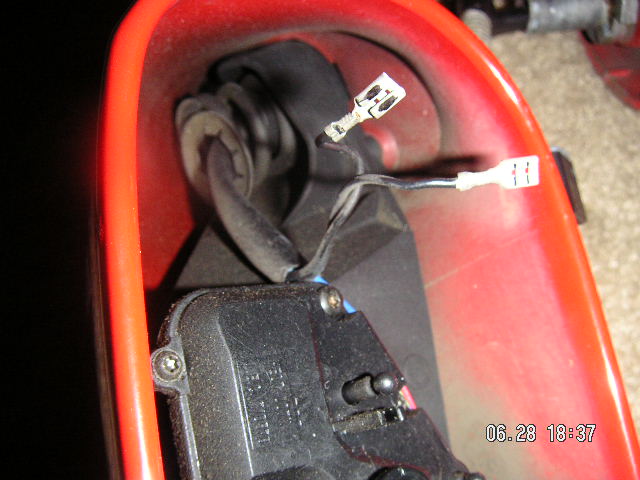
- The wires before soldering together
- Everything nicely put together
- As you can see, I had to add extension wires in the mirror, because I had cut them too short. Could not get through the hole.
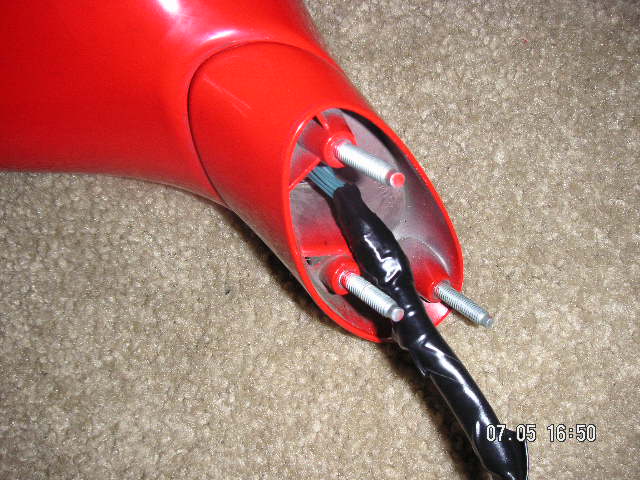
- Done. Just put the glass back on, and put back in the car. There is no way the mirror can pop off again with the two nuts holding the spring on the top and bottom.
- The wires before soldering together
- Everything nicely put together
- As you can see, I had to add extension wires in the mirror, because I had cut them too short. Could not get through the hole.
- Done. Just put the glass back on, and put back in the car. There is no way the mirror can pop off again with the two nuts holding the spring on the top and bottom.
The following users liked this post:
black match box (12-03-2015)

 08-20-2008, 01:43 PM
#8
Burning Brakes


Is it possible to avoid cutting the wires by removing the individual wires from the connector at the other end?
08-20-2008, 03:22 PM
#9
Drifting

Hi all,
Nice job on the mod to fix that stupid mirror problem. I was just gonna weld my washers to the post so it can't break off(and it eventually will without a mod!) Thanks, GM!
Steve
Nice job on the mod to fix that stupid mirror problem. I was just gonna weld my washers to the post so it can't break off(and it eventually will without a mod!) Thanks, GM!
Steve
08-20-2008, 10:14 PM
#10
Racer
Thread Starter
Yes, you can. I did that on the other mirror. However the mirror never quite worked right after that. Could be because I took the motor apart, could be something else, but the mirror seems to have a mind of its own now.
08-23-2008, 06:02 PM
#11
Racer

Member Since: Aug 2002
Location: Sugar Land Tx
Posts: 469
Likes: 0
Received 0 Likes
on
0 Posts

Just a thought. What about cutting a slit length wise down the threaded pipe and cut a slit in the nut and washer. That way you could slide the wires through one at a time. But it just might be easier to do what he did and solder the wires. Both ways would work. I hope this problem does not carry over to the C6.
03-02-2009, 09:34 PM
#12
Drifting
Excellent post, I just used this lamp rod fix for my 1997 C5 and it worked perfectly. Instead of crushing the top of the rod I actually mig welded the nuts in place, and then radius ground the lips with a dremel so that the sharp edge wouldn't chafe on the wires. This fix is MUCH better than trying to compress the spring and wire it and install it with a roll pin or E clip. I'll try to post up some pics of my final product but it was similar to waterzap's approach. FYI, I didn't cut off the end of the mirror "pipe" to compress the spring further, I just used a washer that had the same ID as the "pipe" so it would slip over once the nut was fully tightened. Works perfectly, good as new. GREAT THREAD!!!!

 03-03-2009, 04:03 PM
#14
Melting Slicks


You basically use a small awl or screwdriver to remove the gray plastic 'shims' from the connector.
This gives you access to the wire/pin where it slides into the connector. The pin has a small "dog ear" that locks it into the socket, but that can be moved out of the way using a small sewing needle, or one of those pins that comes with a new dress shirt.
Use the pin to reach into the socket and trip the "dog ear" that holds the wire/pin in the socket. It's a PITA at first, but once you figure out the first one, they all just slide right out.
Mark
03-03-2009, 04:23 PM
#15
Burning Brakes
Member Since: Aug 2006
Location: Stark County Ohio
Posts: 1,217
Likes: 0
Received 5 Likes
on
5 Posts
waterzap -
While I like your fix better, below are a couple of other links related to C5 side mirror repair. These may be of additional help to others.
http://97vette.com/howto/mirror/index.html
Found at the Top of the C5 Tech Section - �The Ultimate DIY (Repair) Thread� (POST #21)
http://forums.corvetteforum.com/c5-t...th-pics-2.html
http://forums.corvetteforum.com/c5-t...with-pics.html
03-05-2009, 05:05 PM
#17

by far not the best method.....but when I did mine, i just took it apart and ran a screw down from the mirror housing into the base and ran another screw from the base up into the housing. a little loctite to keep em in place and voila...no more swingin' mirror. of course it doesnt fold, but then again, i never need it to.
The following users liked this post:
Corvette_Dave (05-02-2018)
03-05-2009, 05:19 PM
#18
Le Mans Master

Just a thought. What about cutting a slit length wise down the threaded pipe and cut a slit in the nut and washer. That way you could slide the wires through one at a time. But it just might be easier to do what he did and solder the wires. Both ways would work. I hope this problem does not carry over to the C6.

I would take the time to take the wires out of the connector.
This is the best solution to the problem I have seen...you can easily compress the spring and do not have to worry about getting the GM clip to stay on. Other solutions have been to reuse the clip, but drill a hole in the mirror shaft and put a pin through it to hold the clip on.
Last edited by TEXHAWK0; 03-05-2009 at 05:25 PM.
03-05-2009, 07:26 PM
#19
Racer
Member Since: May 2007
Location: San Antonio Texas
Posts: 407
Likes: 0
Received 0 Likes
on
0 Posts
great write up! Great minds must think alike. I just fixed mine in an almost identical way. The only difference is i threaded my pipe into the mount rather than running it all the way down. Doesnt it feel good knowing you never have to fix it again?
03-05-2009, 08:13 PM
#20
Le Mans Master
This sounds like a good idea also. Did you have any trouble tapping the mirror base or finding the right size threaded tube to fit the hole in the mirror?