
 03-25-2015, 03:38 PM
Last edit by: IB Advertising
See related guides and technical advice from our community experts:
Browse all: Interior How-Tos
- C6 Corvette: How to Remove Door Panel
Step by step instructions for do-it-yourselfers...
Browse all: Interior How-Tos

HELP how to take c6 door panels off?
04-01-2008, 08:14 PM
#1
Intermediate

Thread Starter

Member Since: Feb 2006
Location: fort st john british columbia
Posts: 33
Likes: 0
Received 0 Likes
on
0 Posts
l can get most of the door off but neer the door handle it wont budge?and if you can help do yo uhave any pics
thanks
thanks
 04-01-2008, 08:25 PM
#2
Le Mans Master


there is threads out there to do this, check c6 faq
did you remove the bolt up by the door handle, i know on passnger side u have to pry off the little door open button and theres a bolt and on the drivers side there is one somewhere to
did you remove the bolt up by the door handle, i know on passnger side u have to pry off the little door open button and theres a bolt and on the drivers side there is one somewhere to
04-01-2008, 09:25 PM
#3
Le Mans Master


Check my install thread, linked in my signature below. It includes door removing instructions.
The following users liked this post:
jbrianfoto (06-12-2022)
04-01-2008, 10:22 PM
#4
Melting Slicks

Member Since: Jan 2007
Location: SOUTHERN CALI - Most of the time California
Posts: 2,749
Likes: 0
Received 2 Likes
on
2 Posts
Here is some info from my other thread. Just ignore the insulation part.
Removal & Insulation of Door Panels
This information might be beneficial to others if they decide on upgrade speakers or insulation of the doors.
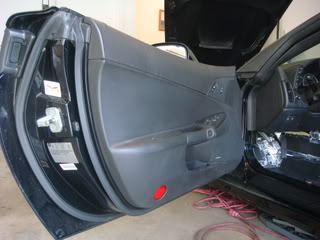
The driver’s door
The first thing you want to do is raise the window up. Once you pull off the panel, you can’t raise the window and you won’t have access to the inner shell of the door.
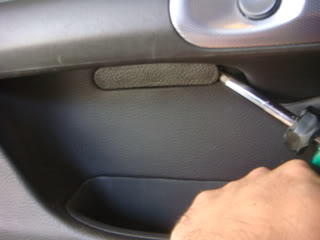
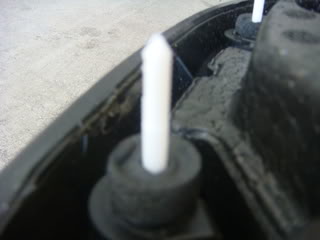
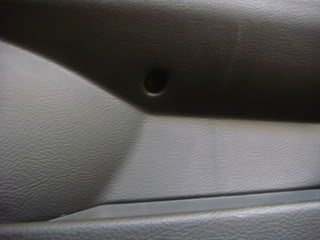
The driver’s door has a total of two bolts. They are located right below the door handle. If you look closely, you will see a small plastic cover. Remove the cover and you will see the two bolts. Uses the proper tools and remove the bolts, failure of using the proper tools may strip the bolts.
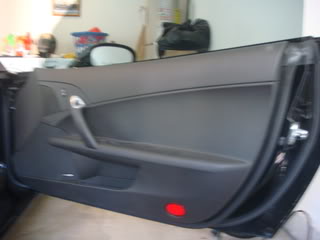
On the bottom of the door there is a little opening to pull the panel off. Just pull away at different positions. It’s going to sound like the door is ripping apart, but that’s from the plastic holders. Once you have the panel loose, don’t yank it out. There is one main cable harness that needs to be taken off.
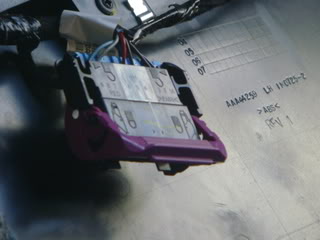
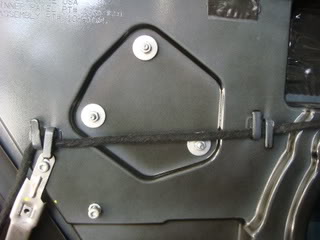
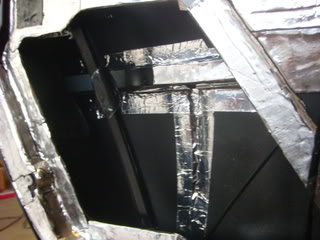
Once you get to this point, you will see the exposed outer door shell. You will also see the 10” Bose woofer and a large rubber cover on the left side of the door. The rubber cover provides access to the inner shell of the door.
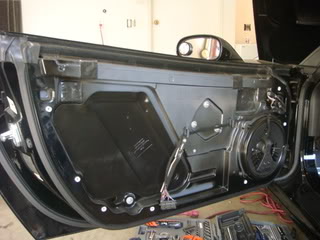
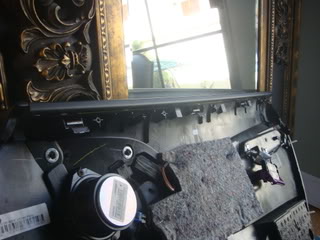
Remove the Bose woofer from the door. There is a little connector that you need to disconnect when the speaker is loose. Then you want to remove the large plastic cover on the left side of the door. Once all that is done, you will have partial access to the inner shell of the door. Do not remove any bolts on the outer shell of the door; these bolts hold the window system.

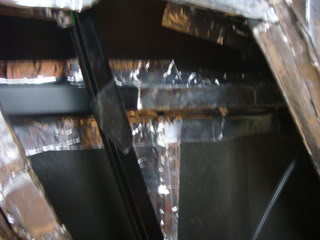
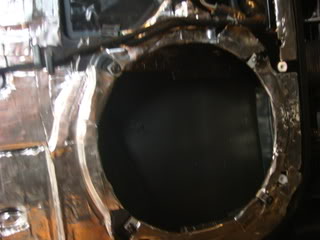
I basically covered � of the inner shell of the door with Damplifer Pro and Luxury liner. It’s a tight squeeze but it’s doable with the speaker and rubber opening. That area took me about an hour or so to do. I then did the outer shell of the door with Damplifer Pro. This area is very hard to do and the surface is not flat. The outer shell took me 2-3 hours to do.
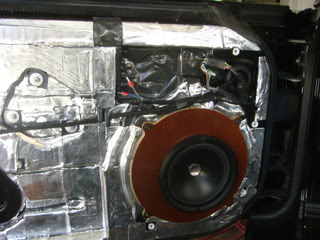
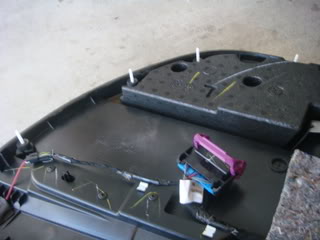
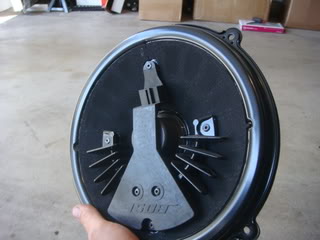
This pic shows an upgraded JL speaker and mount plate.
A WARNING – be careful not to insulate the edges of the door because they are exposed with the door panel on. I made this mistake on the outer shell and it took me a couple hours per door to clean up. Just insulate to the edge of the panel clips, basically leave at least one-inch strip around the door without any insulation.
The driver’s side has about 10-15 pounds of insulation. But, it is so solid and it shuts better than a Lexus, a nice thump. This will definitely improve the sound of the speakers.
Putting the door panel back is a partial PITA. On the top of the door panel, there are metal hooks. You want to put those in before pushing in the clips. It will help to have the window down. Just take your time to figure it out so you don’t scratch your door. When you push in the clips, make sure they are perfectly aligned, so you don’t break any.
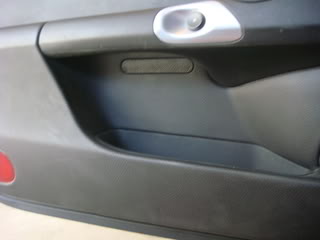
The Passenger Door
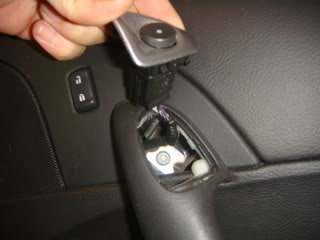
Removal of the passenger door panel is different than the driver’s side. First you have to pop off the door open button plastic piece. You will see a bolt; just remove it with the proper tools. There is another bolt on the bottom of the handrail. Repeat the process similar to the driver’s side.
Removal & Insulation of Door Panels
This information might be beneficial to others if they decide on upgrade speakers or insulation of the doors.
The driver’s door
The first thing you want to do is raise the window up. Once you pull off the panel, you can’t raise the window and you won’t have access to the inner shell of the door.
The driver’s door has a total of two bolts. They are located right below the door handle. If you look closely, you will see a small plastic cover. Remove the cover and you will see the two bolts. Uses the proper tools and remove the bolts, failure of using the proper tools may strip the bolts.
On the bottom of the door there is a little opening to pull the panel off. Just pull away at different positions. It’s going to sound like the door is ripping apart, but that’s from the plastic holders. Once you have the panel loose, don’t yank it out. There is one main cable harness that needs to be taken off.
Once you get to this point, you will see the exposed outer door shell. You will also see the 10” Bose woofer and a large rubber cover on the left side of the door. The rubber cover provides access to the inner shell of the door.
Remove the Bose woofer from the door. There is a little connector that you need to disconnect when the speaker is loose. Then you want to remove the large plastic cover on the left side of the door. Once all that is done, you will have partial access to the inner shell of the door. Do not remove any bolts on the outer shell of the door; these bolts hold the window system.
I basically covered � of the inner shell of the door with Damplifer Pro and Luxury liner. It’s a tight squeeze but it’s doable with the speaker and rubber opening. That area took me about an hour or so to do. I then did the outer shell of the door with Damplifer Pro. This area is very hard to do and the surface is not flat. The outer shell took me 2-3 hours to do.
This pic shows an upgraded JL speaker and mount plate.
A WARNING – be careful not to insulate the edges of the door because they are exposed with the door panel on. I made this mistake on the outer shell and it took me a couple hours per door to clean up. Just insulate to the edge of the panel clips, basically leave at least one-inch strip around the door without any insulation.
The driver’s side has about 10-15 pounds of insulation. But, it is so solid and it shuts better than a Lexus, a nice thump. This will definitely improve the sound of the speakers.
Putting the door panel back is a partial PITA. On the top of the door panel, there are metal hooks. You want to put those in before pushing in the clips. It will help to have the window down. Just take your time to figure it out so you don’t scratch your door. When you push in the clips, make sure they are perfectly aligned, so you don’t break any.
The Passenger Door
Removal of the passenger door panel is different than the driver’s side. First you have to pop off the door open button plastic piece. You will see a bolt; just remove it with the proper tools. There is another bolt on the bottom of the handrail. Repeat the process similar to the driver’s side.
The following users liked this post:
ClashBandicoot (12-27-2016)


 06-25-2013, 05:27 PM
#11
My driver's side panel squeeks (metallic Squeak) when going over bumps. I am pretty sure it is one of the attachment points for the panel - any suggestions as to how to quiet?
07-10-2013, 04:04 PM
#13


The real trick is getting them back on.
Some use a shoestring to pull the metal tabs back on the top of the door panel. I've never done that. Just pay really close attention to where the door panel is when it comes off, then you can re-hang it doing the reverse. It's probably a good idea to replace all the fasteners while you have the door panel off as they tend to get loose pretty easily in my experience.
Some use a shoestring to pull the metal tabs back on the top of the door panel. I've never done that. Just pay really close attention to where the door panel is when it comes off, then you can re-hang it doing the reverse. It's probably a good idea to replace all the fasteners while you have the door panel off as they tend to get loose pretty easily in my experience.
 07-26-2013, 09:29 PM
#15
http://www.clipsandfasteners.com/Sea...x=0&Search.y=0
you need both the male and female. I think you need 2 packages to get both doors done.
you need both the male and female. I think you need 2 packages to get both doors done.
02-23-2014, 06:46 PM
#19
Tech Contributor
That was posted as a reply to a question about a squeaky and possibly loose skin, I was suggesting that he check the screws that hold it down before pulling it apart.
02-24-2014, 05:49 PM
#20
Advanced

Member Since: Nov 2013
Location: Redmond OR
Posts: 80
Likes: 0
Received 0 Likes
on
0 Posts
Thanks, I fixed my door squeak the other day with a bit of double sided foam where the two pieces meet at the midline.
