Max Jax Arrived today... fun begins
 01-20-2011, 04:03 PM
#1
Racer

Thread Starter
Member Since: Jan 2009
Location: Cuyahoga Falls Ohio
Posts: 353
Likes: 0
Received 2 Likes
on
2 Posts

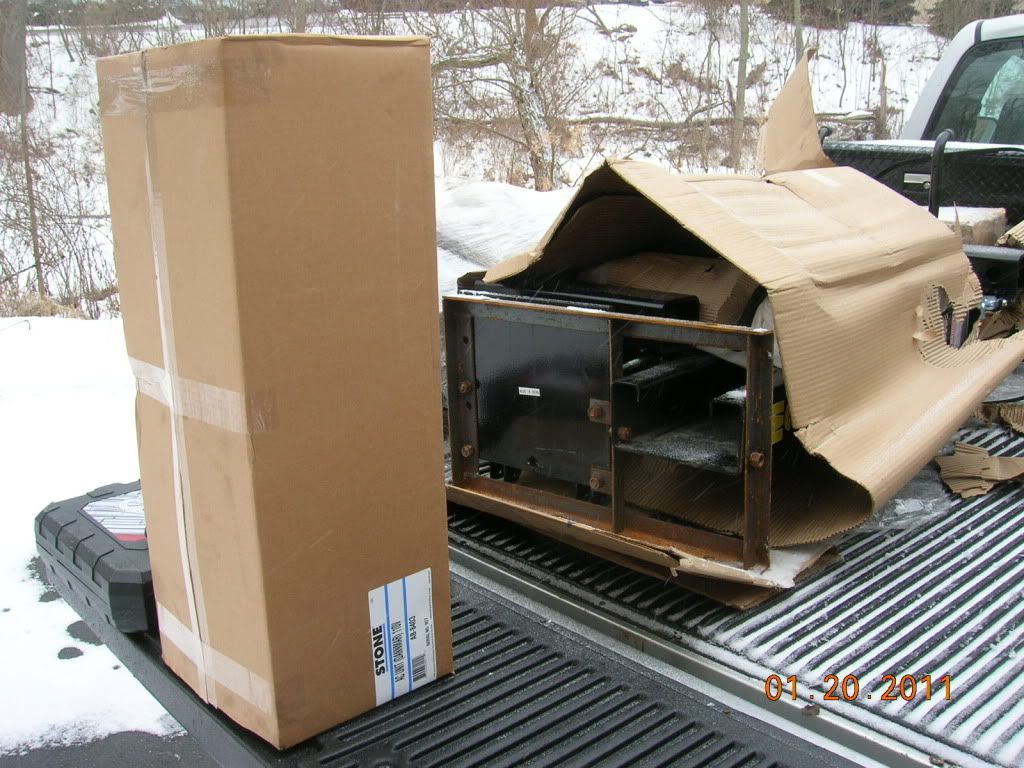
Had my Max Jax dropped at the freight dock since I did not have
a way to unload a wrapped 800 lb. package off of a truck. The
dock folks tow motored it on to my 3/4 ton pick up and off I went.
I had heard that each column/ram set weighted 300 lbs each so
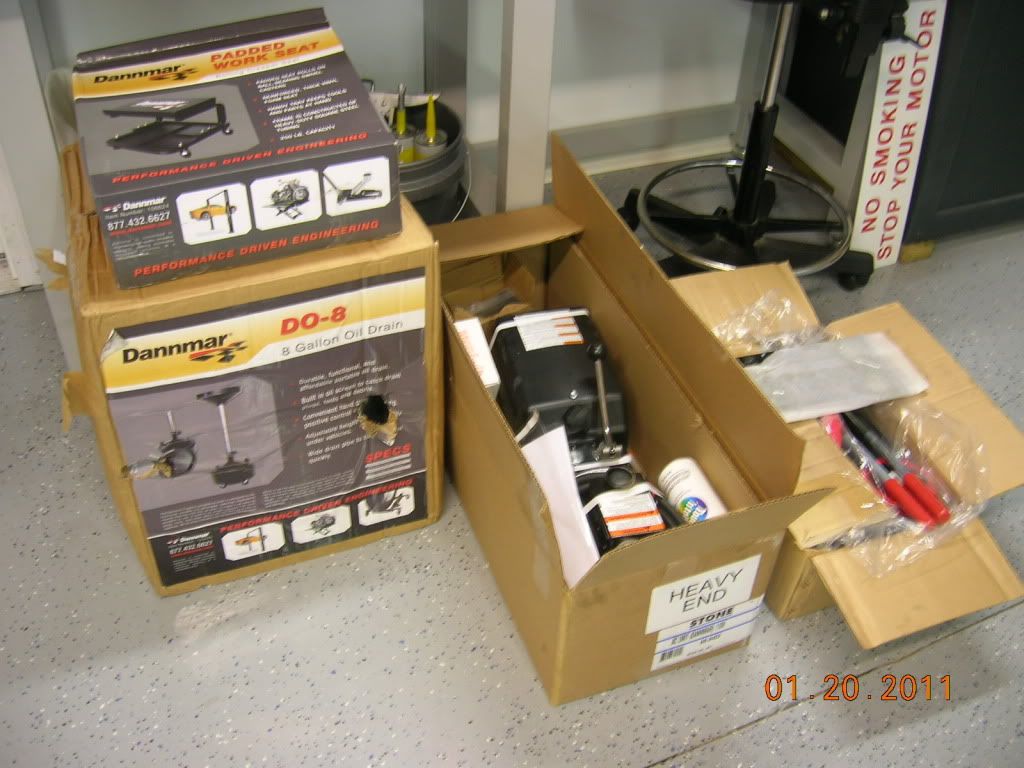
that was going to be my challenge. I unwrapped the package,
unloaded the rolling seat, and the 8 gallon oil drain unit which I
ordered as options. Seat only cost $20 and the oil drain unit $49
great prices when you compare to Summit Racing, or other sources.
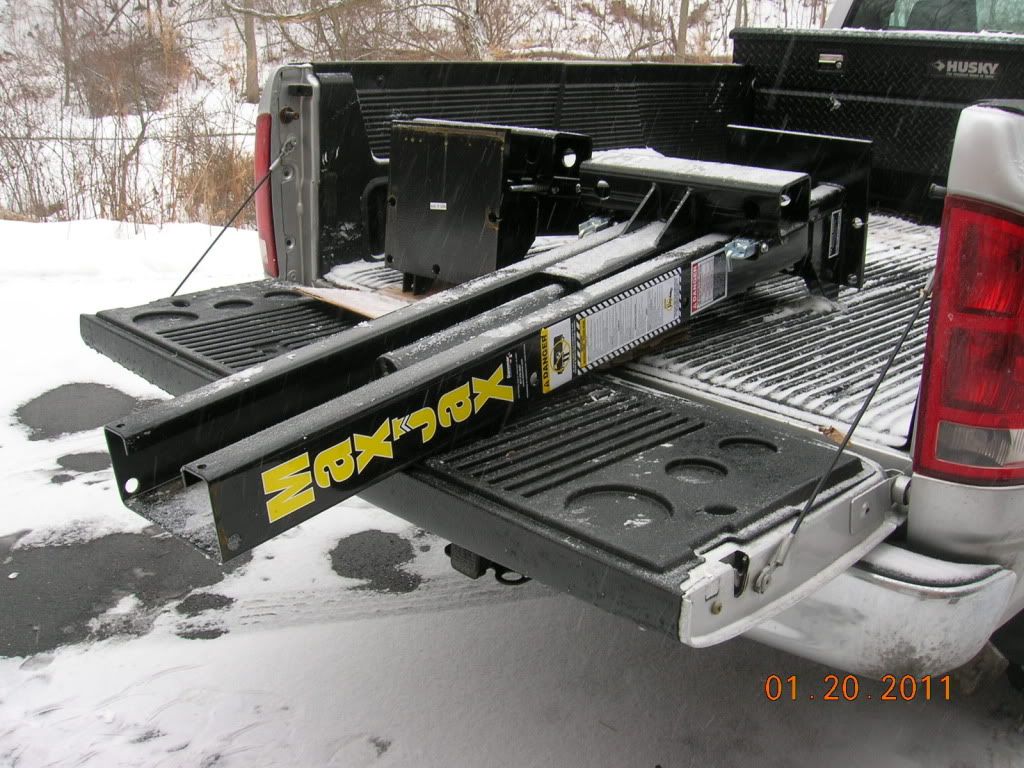
Any way I unbolted the columns from the metal frame they use for
shipping and slid the column out to the end of the tailgate, that is
when I noticed the ram slide ?? Turns out the ram can easily be
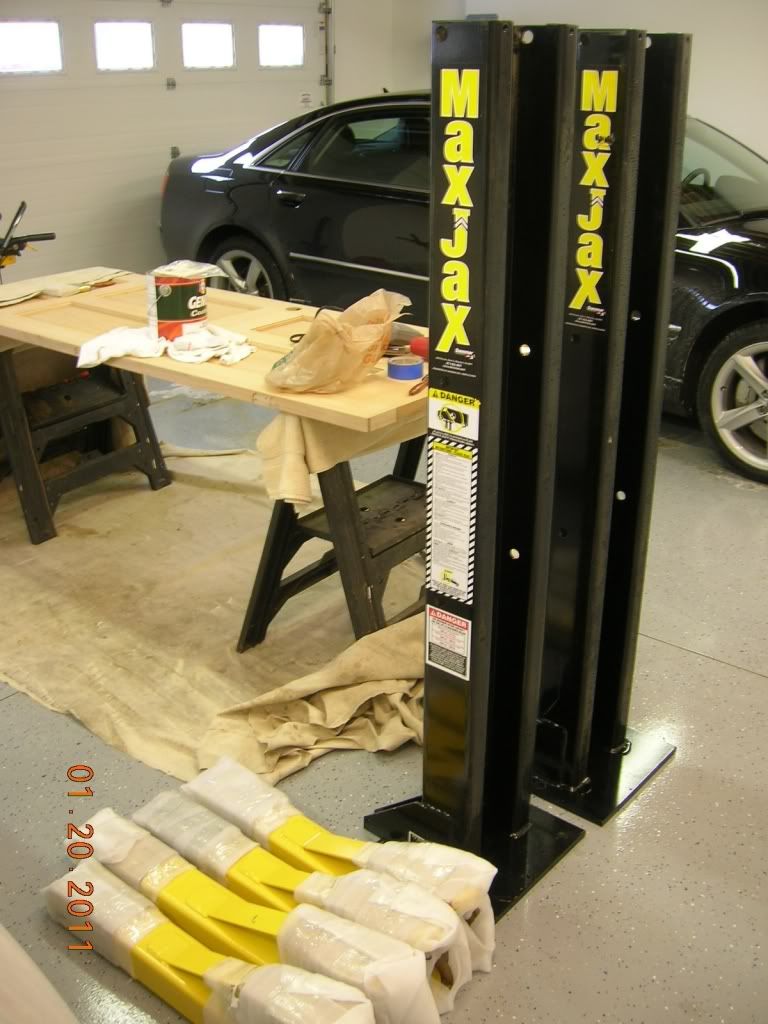
removed from the column which cuts the weight in half. I then tipped
the column to the ground and used a dolly to transport into my
garage. Had it all unwrapped, unbolted, and in my garage (While
working in slippery snow) in less than 45 minutes and did it all myself
without the need for second person to assist with lifting.
Attached photos of the process.
This weekend I will space the columns and determine which bay and
what spacing will suit the cars I wish to lift. I'll take more photos
during the drilling process.
a way to unload a wrapped 800 lb. package off of a truck. The
dock folks tow motored it on to my 3/4 ton pick up and off I went.
I had heard that each column/ram set weighted 300 lbs each so
that was going to be my challenge. I unwrapped the package,
unloaded the rolling seat, and the 8 gallon oil drain unit which I
ordered as options. Seat only cost $20 and the oil drain unit $49
great prices when you compare to Summit Racing, or other sources.
Any way I unbolted the columns from the metal frame they use for
shipping and slid the column out to the end of the tailgate, that is
when I noticed the ram slide ?? Turns out the ram can easily be
removed from the column which cuts the weight in half. I then tipped
the column to the ground and used a dolly to transport into my
garage. Had it all unwrapped, unbolted, and in my garage (While
working in slippery snow) in less than 45 minutes and did it all myself
without the need for second person to assist with lifting.
Attached photos of the process.
This weekend I will space the columns and determine which bay and
what spacing will suit the cars I wish to lift. I'll take more photos
during the drilling process.


 01-20-2011, 04:16 PM
#3
Burning Brakes


Member Since: Jul 2009
Location: Sarasota,FL & NW Indiana
Posts: 772
Likes: 0
Received 7 Likes
on
4 Posts
I installed one June 2010. Get the biggest hammer drill.
I used the spacing at 115". If I did it again would go 120".
Also order more anchors(3 each side) for a second spacing if needed.
I think that would give another 5" spacing. Works ok after bleeding 3/4 times.
Jim

I used the spacing at 115". If I did it again would go 120".
Also order more anchors(3 each side) for a second spacing if needed.
I think that would give another 5" spacing. Works ok after bleeding 3/4 times.
Jim
Last edited by jjtoma; 01-20-2011 at 04:21 PM.


 01-20-2011, 06:43 PM
#6
Melting Slicks


This should be an interesting thread.
Take lots of pictures of the install process....I think a lot of us would like to follow along and see how it goes.
Getting new toys is always fun
Take lots of pictures of the install process....I think a lot of us would like to follow along and see how it goes.
Getting new toys is always fun
01-20-2011, 07:54 PM
#7
Racer
Thread Starter
Member Since: Jan 2009
Location: Cuyahoga Falls Ohio
Posts: 353
Likes: 0
Received 2 Likes
on
2 Posts
There are a few good threads on the Max Jax that I have found but
will take my photos along the way. Since my garage is at my office
I can sneak down stairs and work on a few items during the day. Will
try to get the following started tomorrow:
- Mount the pump on the cart
- Go buy 90 degree hose fittings to control the hose placement better
- Build the hoses and attach fittings
- Wheels on the columns
Weekend will be for the heavy work of layout, drilling and bolting.

 01-20-2011, 10:17 PM
#9
Safety Car


Took us two hours to put one of these in...
We also mounted the HPU directly to one of the post VS that piece of **** cart it comes with. Just had to have some longer hoses made.
All in all its a nice lift.
We also mounted the HPU directly to one of the post VS that piece of **** cart it comes with. Just had to have some longer hoses made.
All in all its a nice lift.
01-21-2011, 12:07 PM
#11
Safety Car
You dont need a big garage, it only lifts the vehicle about 4 feet. If you have trusses in your garage you can just remove them and install rafters to give you the roof clearance. Pretty simple stuff. we installed this in a standard 8' ceiling garage with trusses, converted to rafters and now have no issues lifting a SUV all the way up.
01-21-2011, 08:12 PM
#12
Instructor
Member Since: Dec 2010
Location: Owings Maryland
Posts: 211
Likes: 0
Received 0 Likes
on
0 Posts
thanks for posting, I am going to order one next week.
Thats exactly what I need for my 8' ceiling. I got a ton of underneath work to do and I can sit on my **** while doing it.
Thats exactly what I need for my 8' ceiling. I got a ton of underneath work to do and I can sit on my **** while doing it.
 01-22-2011, 05:34 AM
#14
Instructor
Member Since: Dec 2010
Location: Owings Maryland
Posts: 211
Likes: 0
Received 0 Likes
on
0 Posts
01-22-2011, 01:38 PM
#15
Racer
Thread Starter
Member Since: Jan 2009
Location: Cuyahoga Falls Ohio
Posts: 353
Likes: 0
Received 2 Likes
on
2 Posts
Here you go...
Joe Vermillion
Dannmar
646 Flinn Avenue Suite A
Moorpark, CA 93021
Telephone: 877-432-6627 x 103
Cell: 805-341-9999
Fax: 805-530-1909
www.dannmar.com
http://www.youtube.com/user/DannmarEquipment
http://www.hubgarage.com/mygarage/Dannmar
Joe Vermillion
Dannmar
646 Flinn Avenue Suite A
Moorpark, CA 93021
Telephone: 877-432-6627 x 103
Cell: 805-341-9999
Fax: 805-530-1909
www.dannmar.com
http://www.youtube.com/user/DannmarEquipment
http://www.hubgarage.com/mygarage/Dannmar
01-24-2011, 09:47 AM
#16
Instructor
Member Since: Dec 2010
Location: Owings Maryland
Posts: 211
Likes: 0
Received 0 Likes
on
0 Posts
Here you go...
Joe Vermillion
Dannmar
646 Flinn Avenue Suite A
Moorpark, CA 93021
Telephone: 877-432-6627 x 103
Cell: 805-341-9999
Fax: 805-530-1909
www.dannmar.com
http://www.youtube.com/user/DannmarEquipment
http://www.hubgarage.com/mygarage/Dannmar
Joe Vermillion
Dannmar
646 Flinn Avenue Suite A
Moorpark, CA 93021
Telephone: 877-432-6627 x 103
Cell: 805-341-9999
Fax: 805-530-1909
www.dannmar.com
http://www.youtube.com/user/DannmarEquipment
http://www.hubgarage.com/mygarage/Dannmar
01-24-2011, 10:23 AM
#17
Racer
Thread Starter
Member Since: Jan 2009
Location: Cuyahoga Falls Ohio
Posts: 353
Likes: 0
Received 2 Likes
on
2 Posts
A buddy and me started the layout and install of the Max Jax on
Sunday. I have several vehicles that I wish to lift with this unit and
laying out the varing wheel bases/lift points and making sure the arms
of the lift will reach all took a bit of time. I wish to keep the posts in
one location but realize I can install anchors at one of the columns in
a different spot to increase ability. My daily driver car has a 123"
wheel base and is the longest, widest and tallest so I started with that
car.
Layout started with establishing the center point of the garage. Then
the overall length, width and lift points of the long car. Then I adjusted
the position off center in the length direction so the rear of the car at
the garage door was only about a foot. That leaves me with 4 feet
at the nose of the car to walk around. The corvette and mustang will
easily fit as they are much shorter and narrower. I settled on spacing
of the posts at 128" measured from the rear of each base plate. My
longest car will have the arms retracted back to within 1-2" of the
shortest length. When I position for the vette or mustang the arms
will be about 1/2 to 3/4 full length extended. My intent was to
minimize the cantilever.
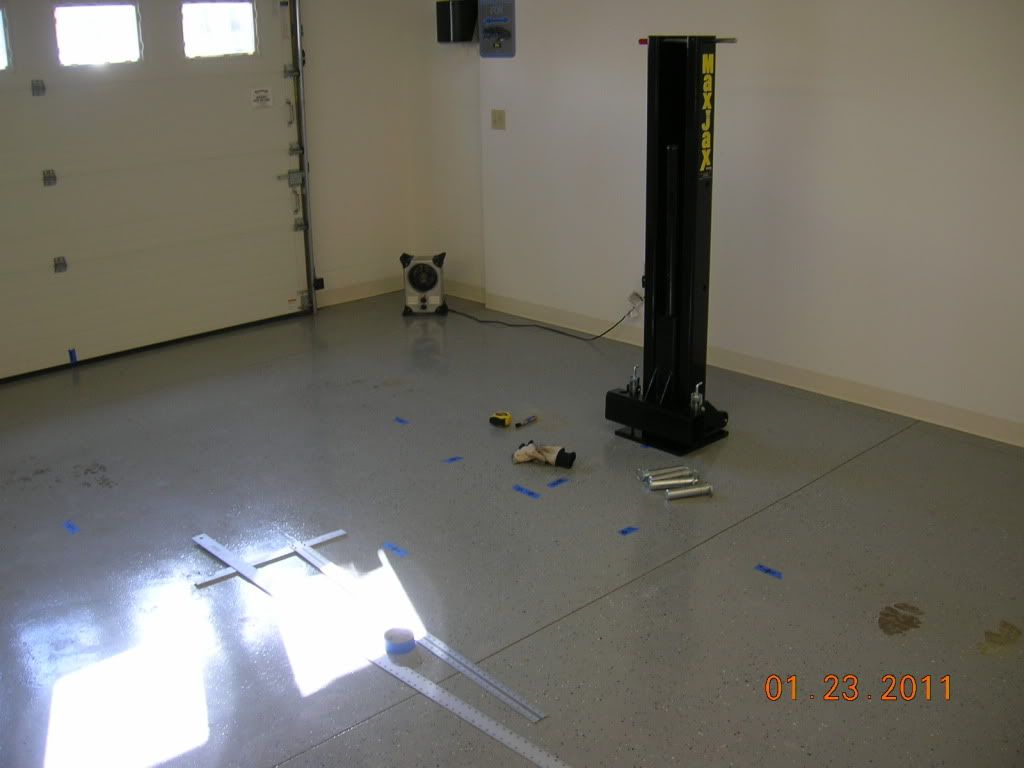
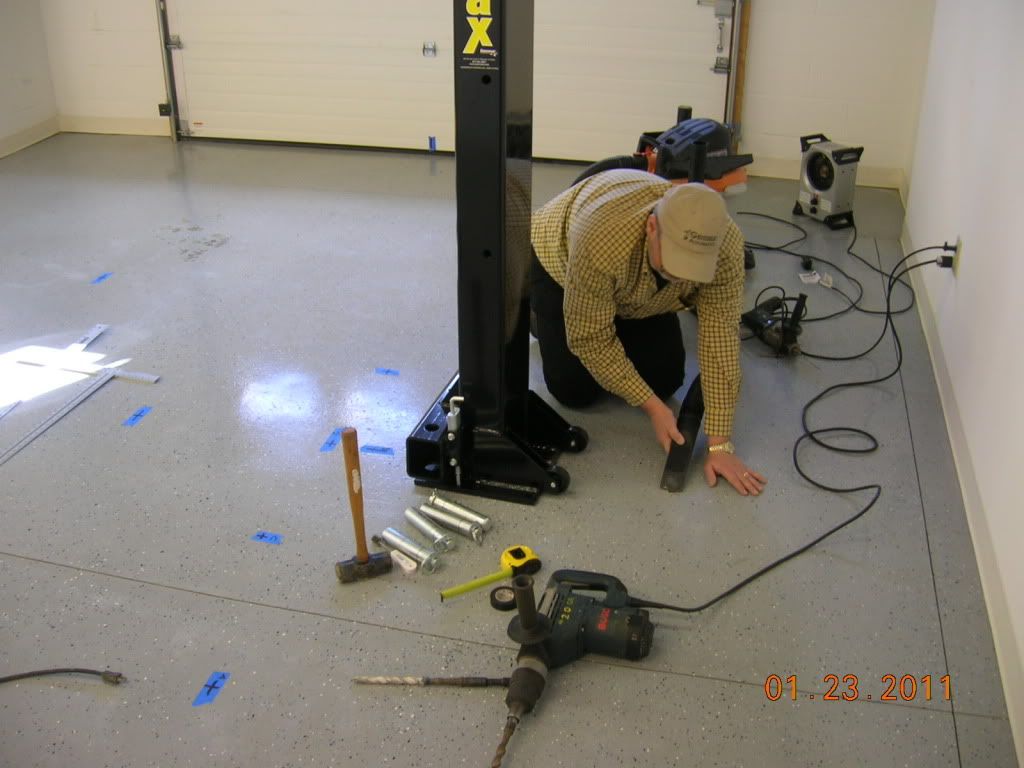
We started hole #1 with a 3/8" concrete bit and then up to the 5/8".
We did not have a 7/8" bit as instructed so we tried the 3/4" to see
if we could make that work... no way ! So we stopped and my mission
today is to obtain a 7/8" bit. By the way I borrowed the BIG hammer
drill motor from a contractor buddy of mine. That is the way to go!
My plan is to use commercial epoxy made for these anchors for added
bonding. Attached photos of our work yesterday, will continue posting
of other photos later in the week.
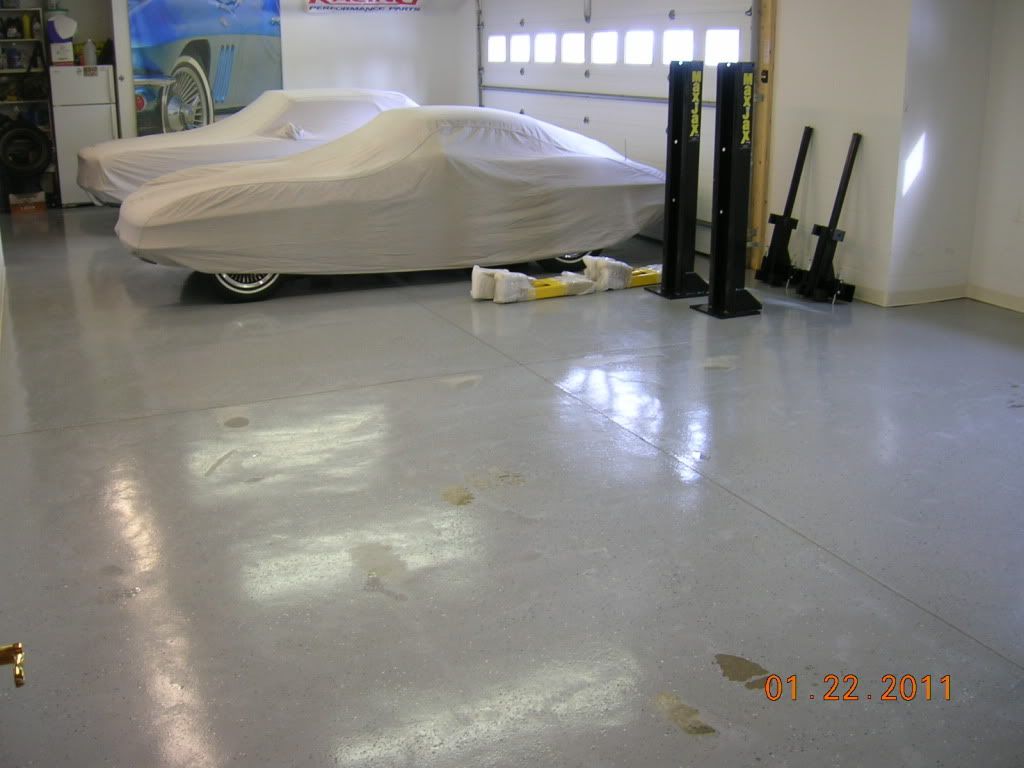
Before photo of bay in garage for lift
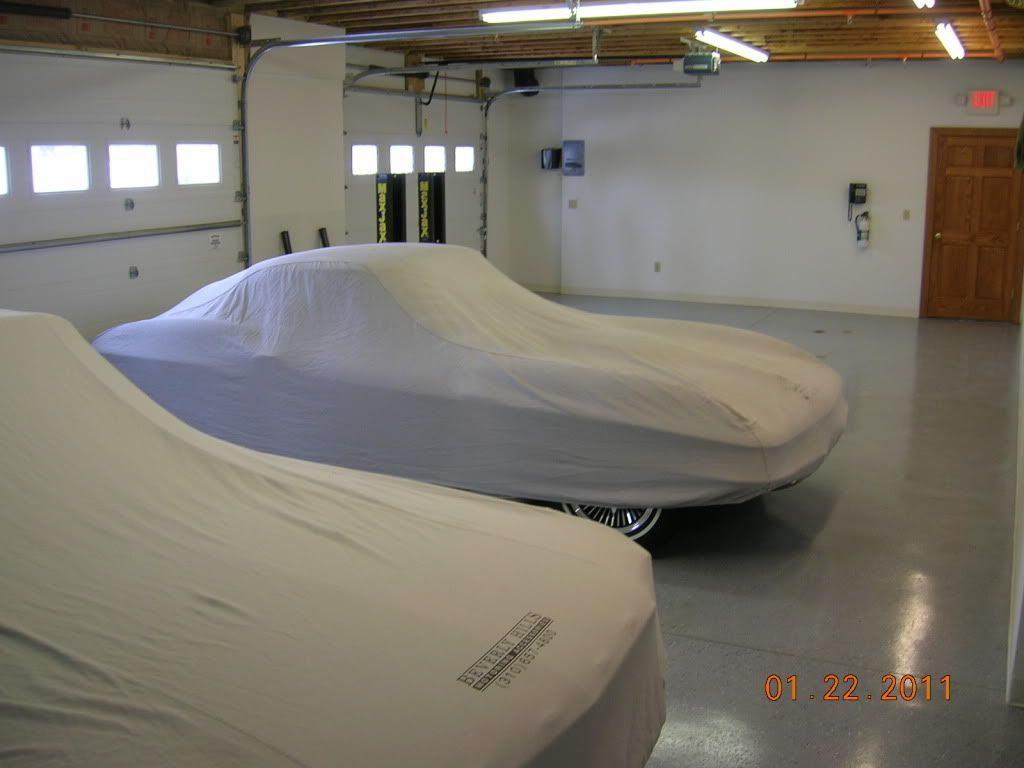
Ditto
Layout marks on floor and position of first post
Buddy addressing the cleaning part..
Sunday. I have several vehicles that I wish to lift with this unit and
laying out the varing wheel bases/lift points and making sure the arms
of the lift will reach all took a bit of time. I wish to keep the posts in
one location but realize I can install anchors at one of the columns in
a different spot to increase ability. My daily driver car has a 123"
wheel base and is the longest, widest and tallest so I started with that
car.
Layout started with establishing the center point of the garage. Then
the overall length, width and lift points of the long car. Then I adjusted
the position off center in the length direction so the rear of the car at
the garage door was only about a foot. That leaves me with 4 feet
at the nose of the car to walk around. The corvette and mustang will
easily fit as they are much shorter and narrower. I settled on spacing
of the posts at 128" measured from the rear of each base plate. My
longest car will have the arms retracted back to within 1-2" of the
shortest length. When I position for the vette or mustang the arms
will be about 1/2 to 3/4 full length extended. My intent was to
minimize the cantilever.
We started hole #1 with a 3/8" concrete bit and then up to the 5/8".
We did not have a 7/8" bit as instructed so we tried the 3/4" to see
if we could make that work... no way ! So we stopped and my mission
today is to obtain a 7/8" bit. By the way I borrowed the BIG hammer
drill motor from a contractor buddy of mine. That is the way to go!
My plan is to use commercial epoxy made for these anchors for added
bonding. Attached photos of our work yesterday, will continue posting
of other photos later in the week.
Before photo of bay in garage for lift
Ditto
Layout marks on floor and position of first post
Buddy addressing the cleaning part..
07-12-2014, 01:17 PM
#18
Instructor

I have one of these two-post lifts, and aside from and initial leak in the flow diverter (new part supplied) I like it. THINK VERY carefully before drilling tthe anchor holes and make sure the posts are in the least intrusive places.
07-12-2014, 11:02 PM
#20
Safety Car
